
How to Add Filters to Portal List Views
Filters let portal users narrow a long list to the records they need, for example cases with a certain status or orders for one account. You choose which fields can be filtered in the list builder, field by field.
Before you start
- You need access to the Design menu in the admin portal.
- Create the list first. See How to Create List Views in CRMJetty Portal.
- To limit which lookup values portal users can pick, create a workflow with the Load Data action type first, under Settings → Portal Settings → Workflow Management. See How to Filter Which Records Portal Users See.
Make a field filterable
- Go to Design → Lists.
- Select the three dots (…) next to the list, then select Edit.
- Select the Settings icon on the field you want portal users to filter by.
- Select Enable for Filter.
- Select Save.
- Repeat for each field.
- Select Publish.
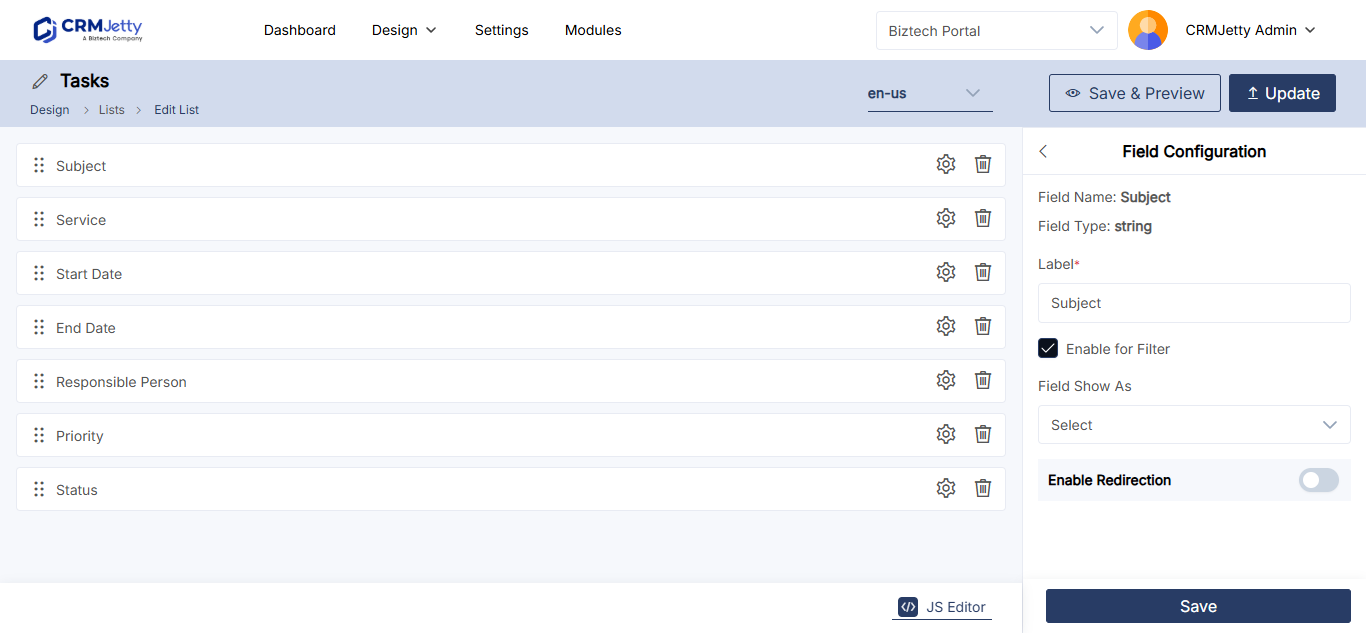
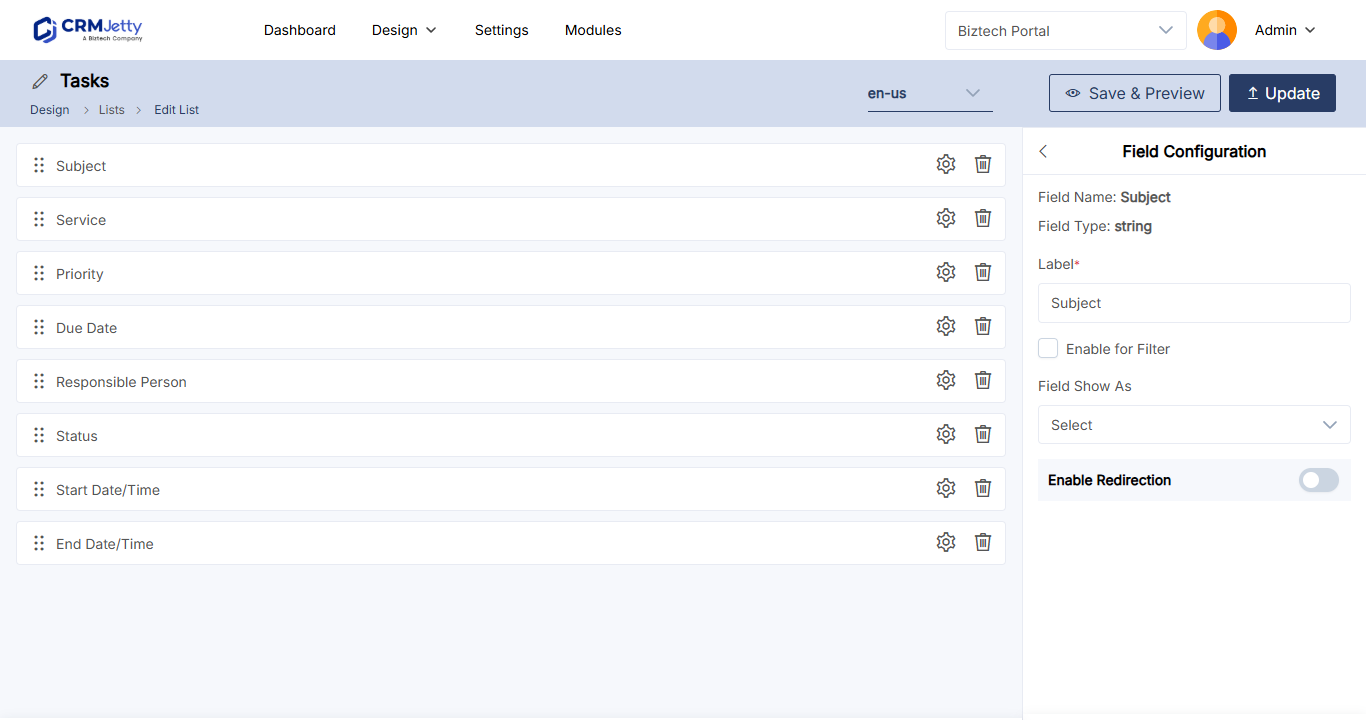
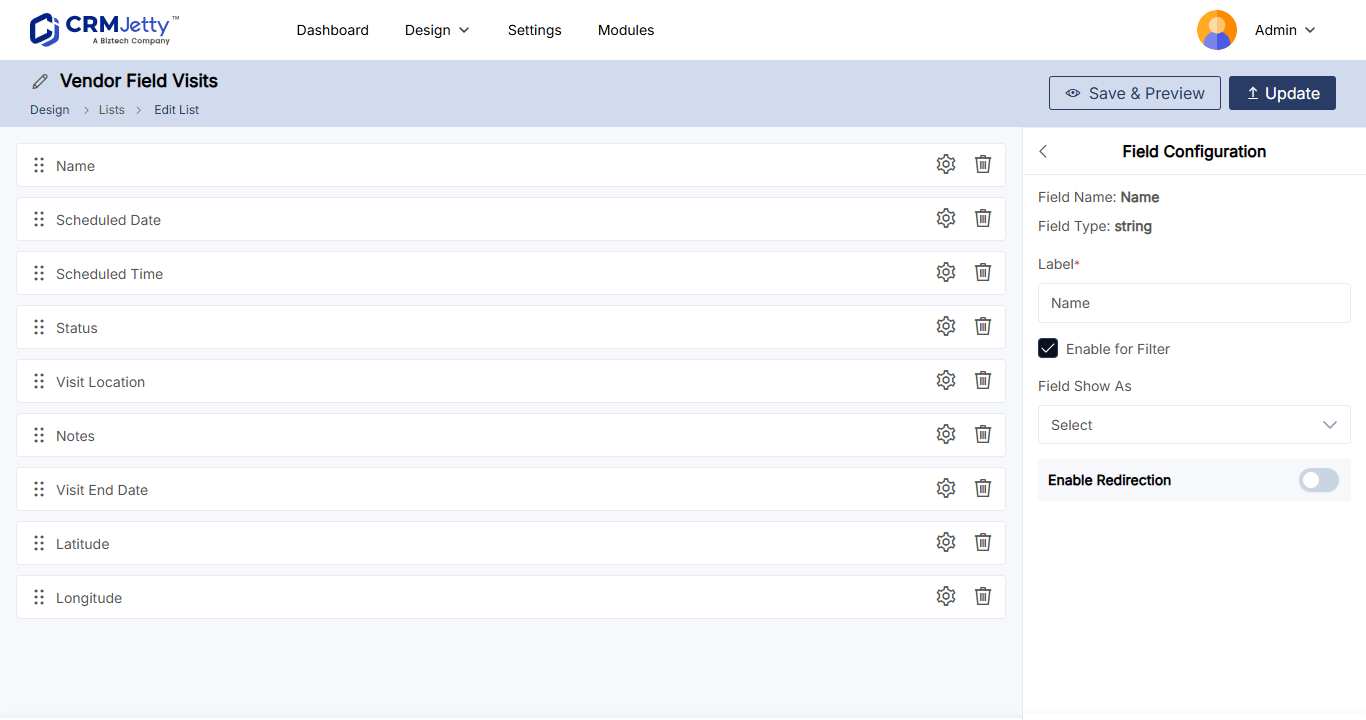
Portal users now get a searchable filter option for each of these fields on every page that shows the list.
Note: In older versions this option is called Add to Filter’s list.
Note: You can’t filter on a field shown as an image. If Show as Image is selected for a field, Enable for Filter is disabled.
Filter by a lookup field
When the field is a lookup and Enable for Filter is selected, extra settings appear. Use them to control which values the filter offers.
Limit the values with a workflow
- In the field’s settings, select Workflow Setting.
- In the Data Load drop-down, select a workflow. Only workflows with the Load Data action type for the field’s target entity are listed.
- Select Save.
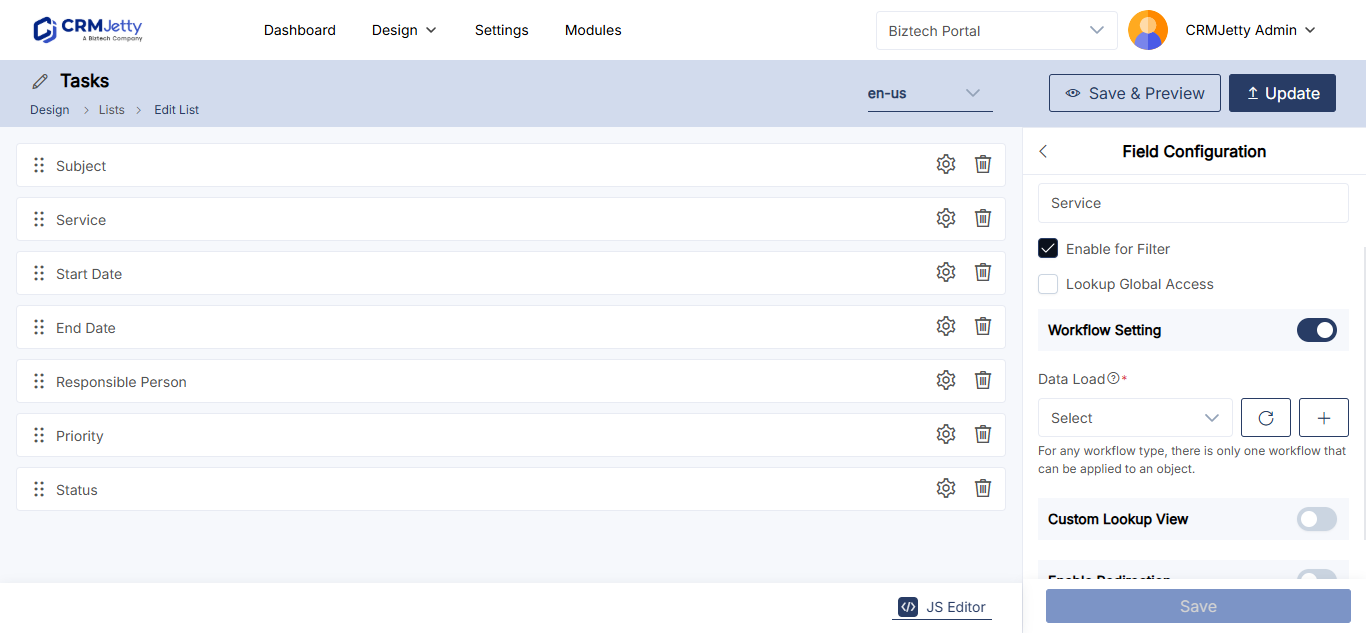
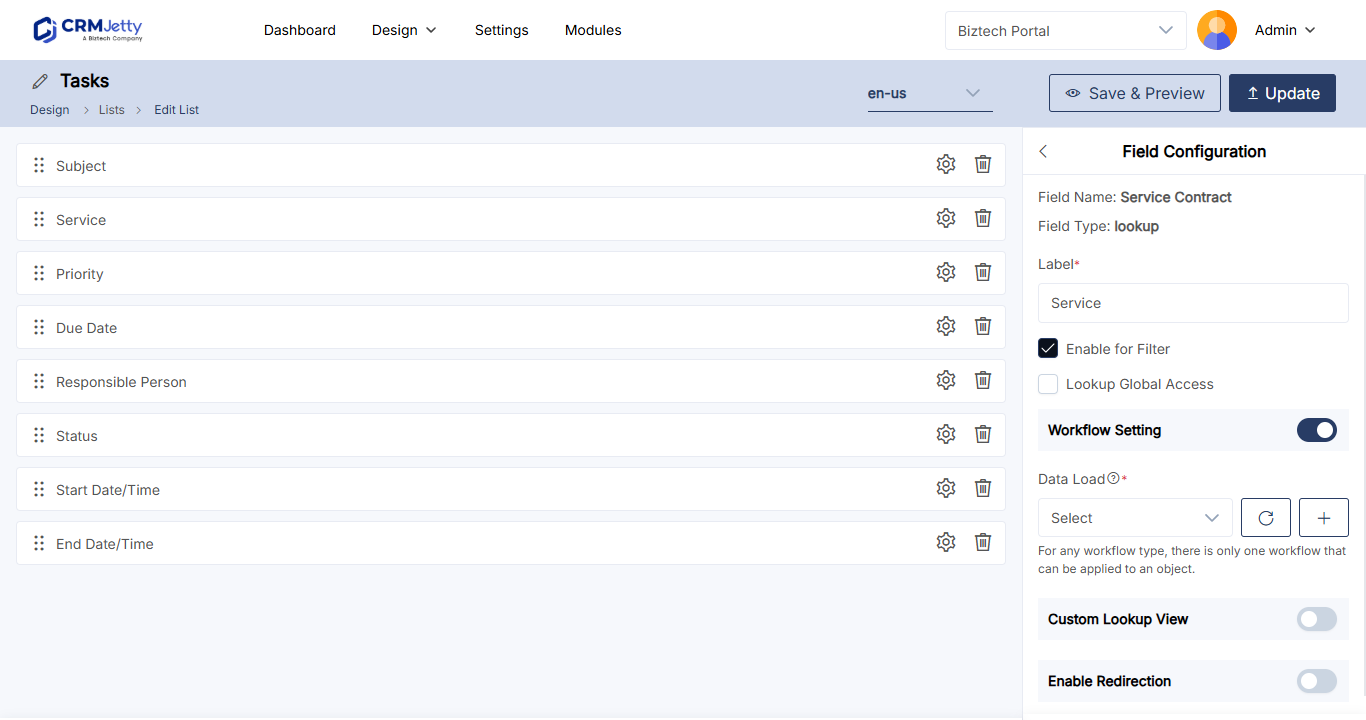
To create a workflow from here, select the + icon. The Add Workflow page opens with the entity already selected.
Show all values
Select Lookup Global Access to show all records of the related entity in the lookup filter, regardless of other filters or restrictions. For example, with Lookup Global Access on a customer lookup, the filter lists all customers.
Important: Lookup Global Access can show portal users records outside their own account. Turn it on only when every portal user who sees the list may see all those values. Otherwise, limit the values with a Data Load workflow.
Choose the fields a lookup shows
Custom Lookup View sets which fields of the related entity a lookup displays, and in what order.
- In the lookup field’s settings, select Custom Lookup View.
- In Custom Lookup Settings, select the related entity. Its primary field, such as Account Name, is added first and stays at the top.
- Add up to 4 more fields, such as Account Rating.
- Arrange the fields in the order you want.
- Select Save.
A custom lookup view holds up to 5 fields: 1 primary and 4 additional. Field names appear in the portal user’s language, or in English if no translation exists.
Add filters on the List widget
The List widget on a page has two more filter options. Open the page in Design → Page Builder and select the Settings icon on the List widget.
| Setting | What it does |
|---|---|
| Enable Global Access | Lets portal users see global data, not only their own records. Portal users get a filter to switch between My Records and All Records. |
| Enable Global Filter | Connects the list to a global filter on the page. Select a Data Field (for example Created On or Modified On) and the Lookup Field to filter on (Business Central: a single Select Global Filter Field). The Global Filter widget is available on selected plans; see How to Filter All Dashboard Widgets at Once. |
Select Save, then publish the page.
Filters only narrow what a portal user can already see. To decide which records load in the first place, use a data loading workflow. See How to Apply Workflows to Portal Widgets.
Troubleshooting
Enable for Filter is disabled: Show as Image is selected for the field. Image fields can’t be filtered.
Workflow Setting doesn’t appear: The field isn’t a lookup, or Enable for Filter isn’t selected.
Your workflow is missing from the Data Load drop-down: Only workflows with the Load Data action type and the field’s target entity are listed. Check both in Workflow Management.
Portal users don’t see the filter: Publish the list after you change it, and make sure the page uses that list.
Related articles
- How to Create List Views in CRMJetty Portal
- How to Filter Which Records Portal Users See
- How to Apply Workflows to Portal Widgets
- How to Show Images in Portal List Views