
How to Create List Views in CRMJetty Portal
A list view shows CRM records to portal users as a table, for example their open cases or recent invoices. You design each list once in the list builder, choosing the entity (Dynamics 365), object (Salesforce) or table (Business Central) and its fields, then place it on any page with the List widget.
Before you start
- You need access to the Design menu in the admin portal.
- Enable the entity for the portal. Only enabled entities appear in the list builder. See How to Enable CRM Entities and Custom Objects in the Portal.
- Make sure portal users have View permission on the entity in their role. See How to Set Add, Edit and Delete Permissions by Role.
Open the list builder
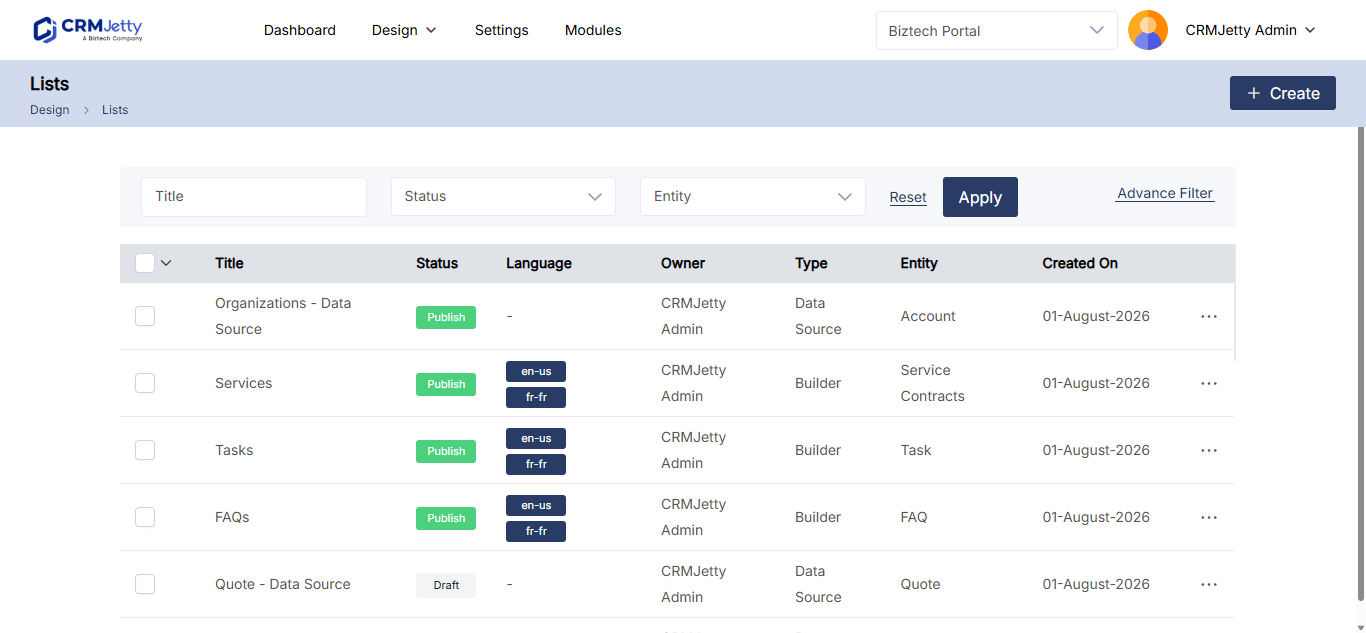
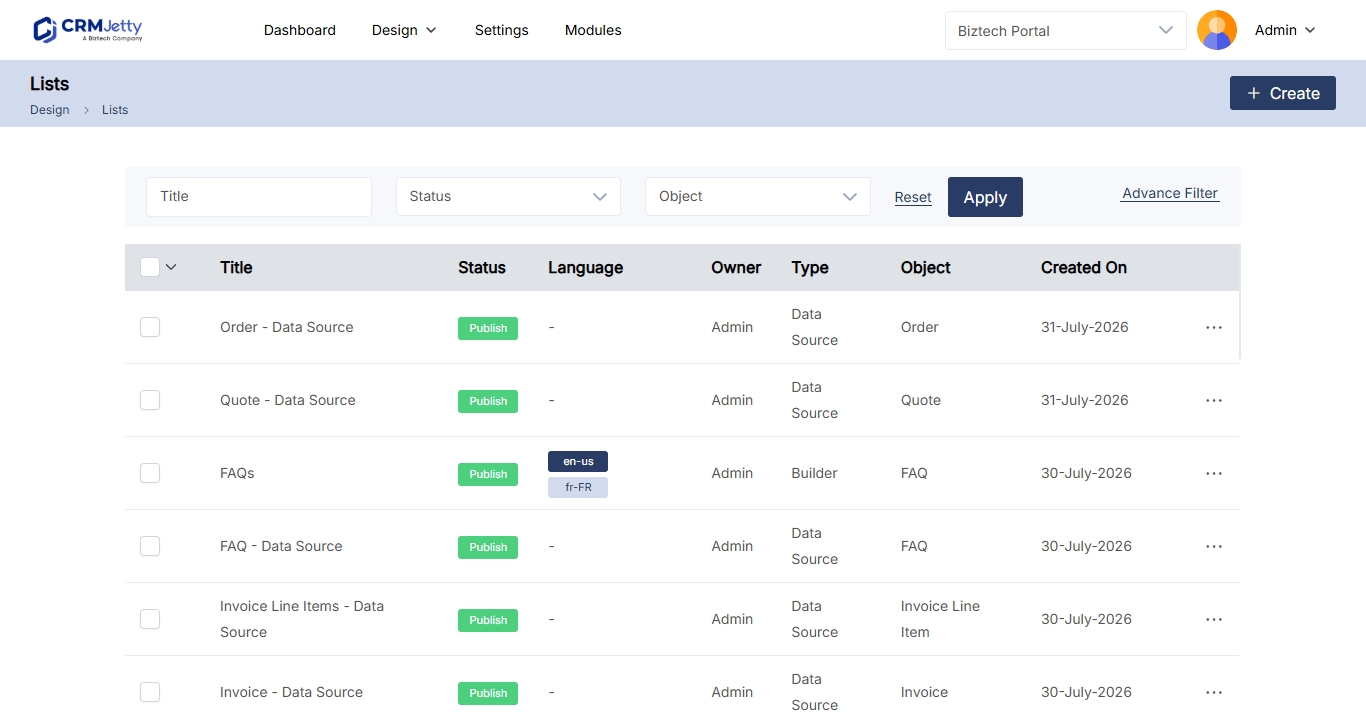
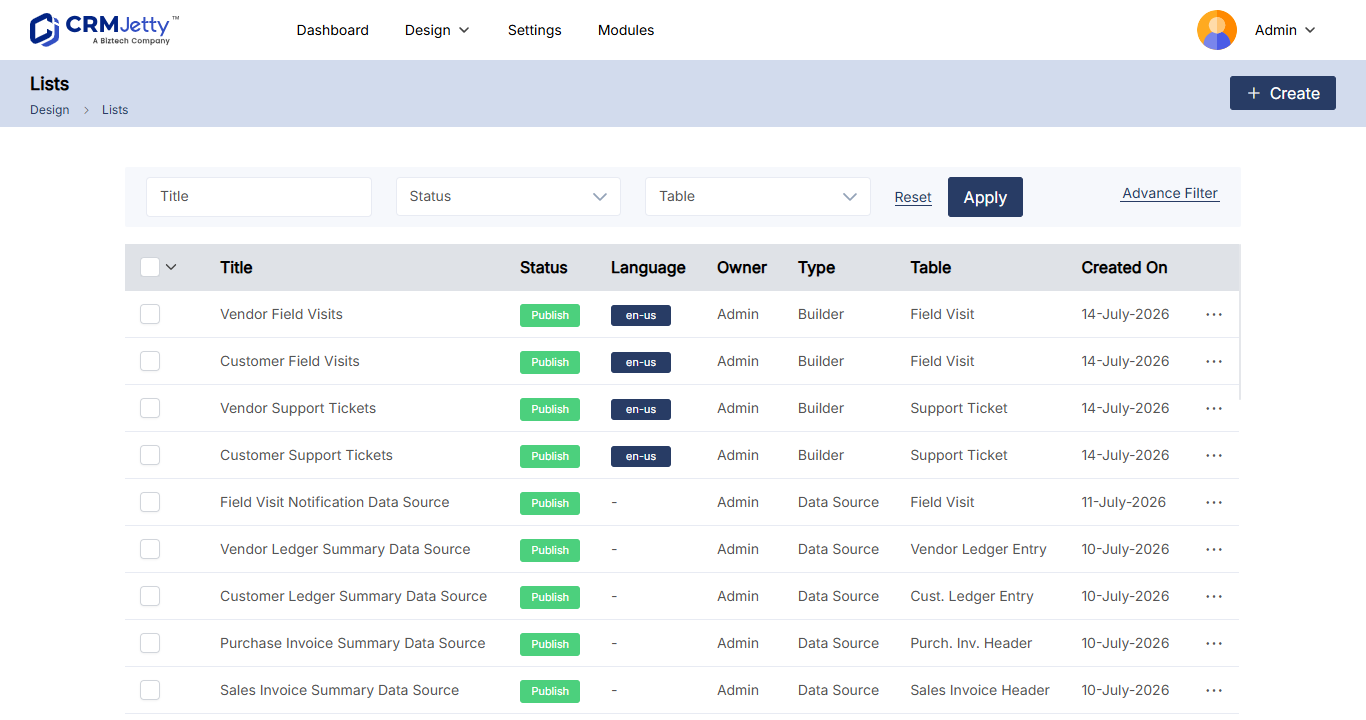
Go to Design → Lists. The list page shows every list with these columns:
| Column | What it shows |
|---|---|
| Title | The name of the list. |
| Status | Whether the list is published or a draft. |
| Language | The languages the list is available in. Translated languages show as dark buttons, untranslated ones as light buttons. |
| Owner | The admin who owns the list. |
| Entity | The entity, object or table the list shows. |
| Created On | The date the list was created. |
To find a list, filter by Title, Status or Entity, or use Advanced Filters. You can also filter by status: All List, My List, Drafts or Published.
Create a list
- In Design → Lists, select + Create.
- In the pop-up, enter a Title for the list.
- Select Save. The list layout design page opens.
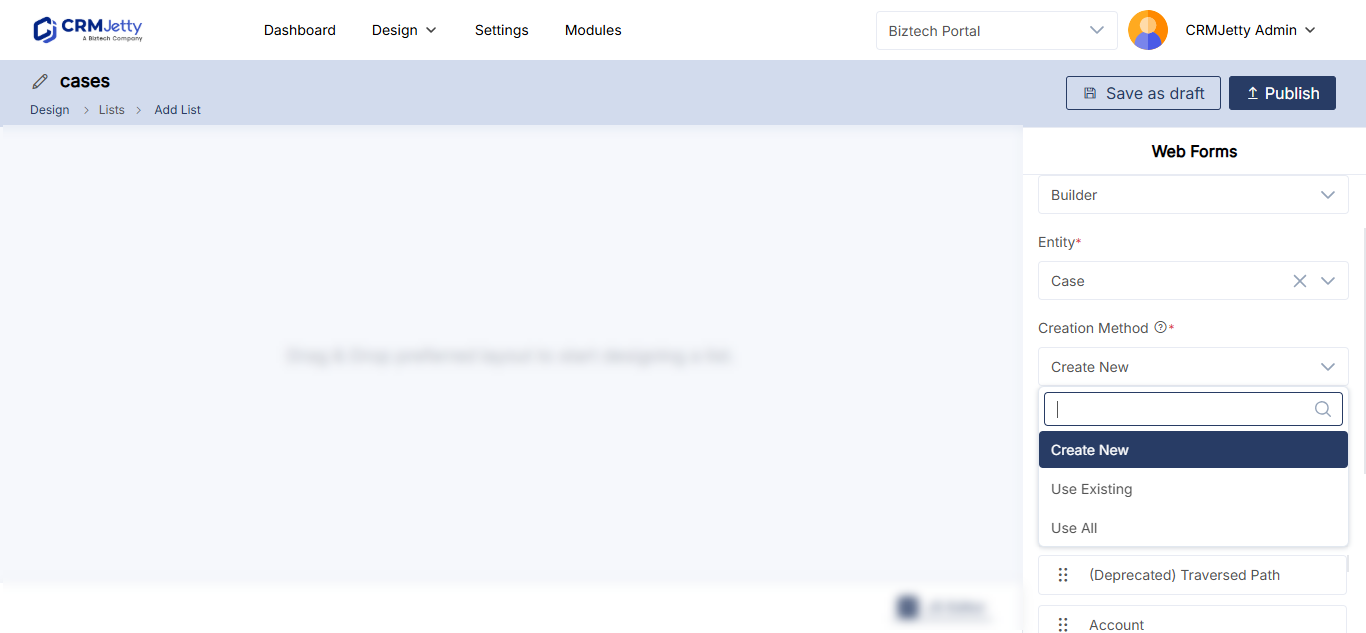
- Select the Type: Builder or Data sources. Choose Builder to pick and configure fields yourself.
- Select the Entity (Business Central: Table) you want to list.
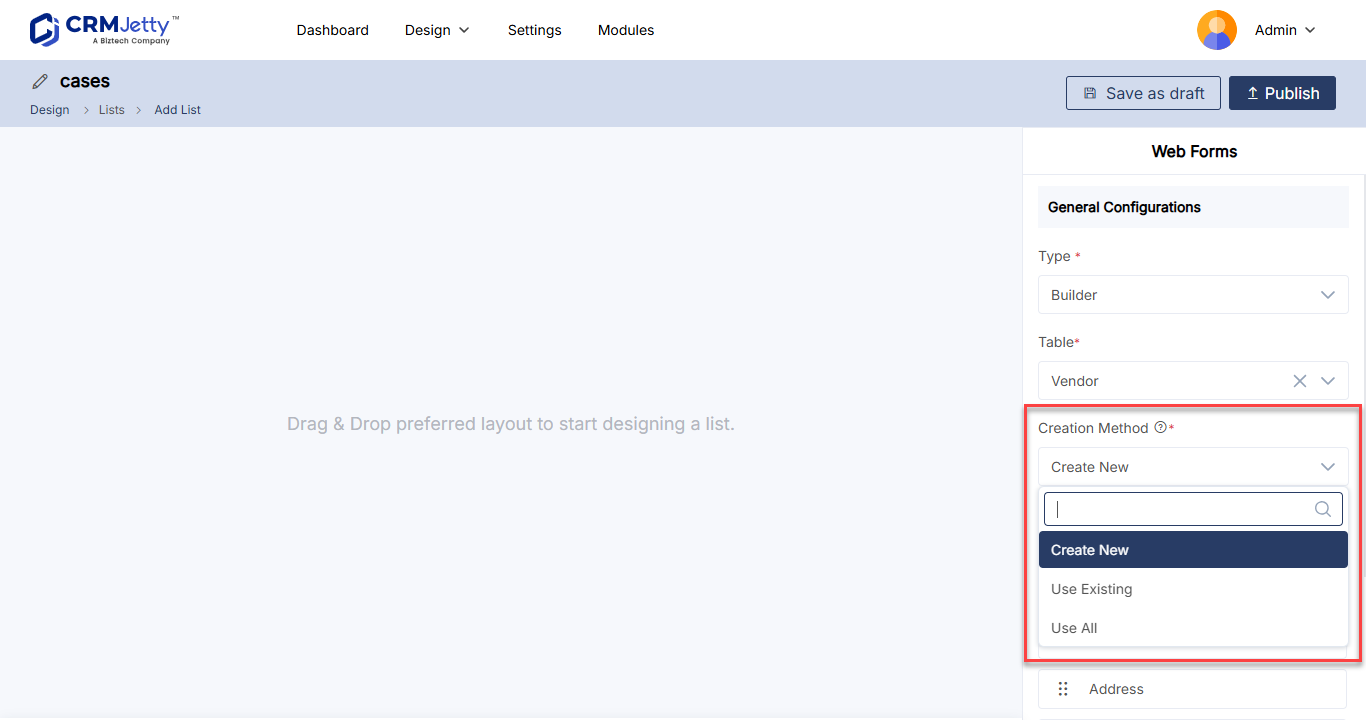
- Choose how to build the list from the drop-down, as described in the table below.
| Option | What it does |
|---|---|
| Create New | Start with an empty list and add fields yourself. |
| Use Existing | Start from a list view (CRM entity view) that already exists in your CRM. |
| Use All | Add all fields of the selected entity. |
Note: If you select Data sources as the type, you can’t configure the list fields.
Important: Choose the entity and creation method carefully. When you edit a list later, you can’t change its entity, switch to Use Existing or use a FetchXML query. You can only change its fields.
Build a list from scratch
- With Create New selected, find the fields on the right. These are the fields enabled from your CRM.
- Drag each field you want from the right into the list on the left. Each field becomes a column.
- To add a field of a related entity, open Related Fields and drag the field in.
- Drag fields up or down to change the column order, so the most important information comes first.
Start from an existing CRM view
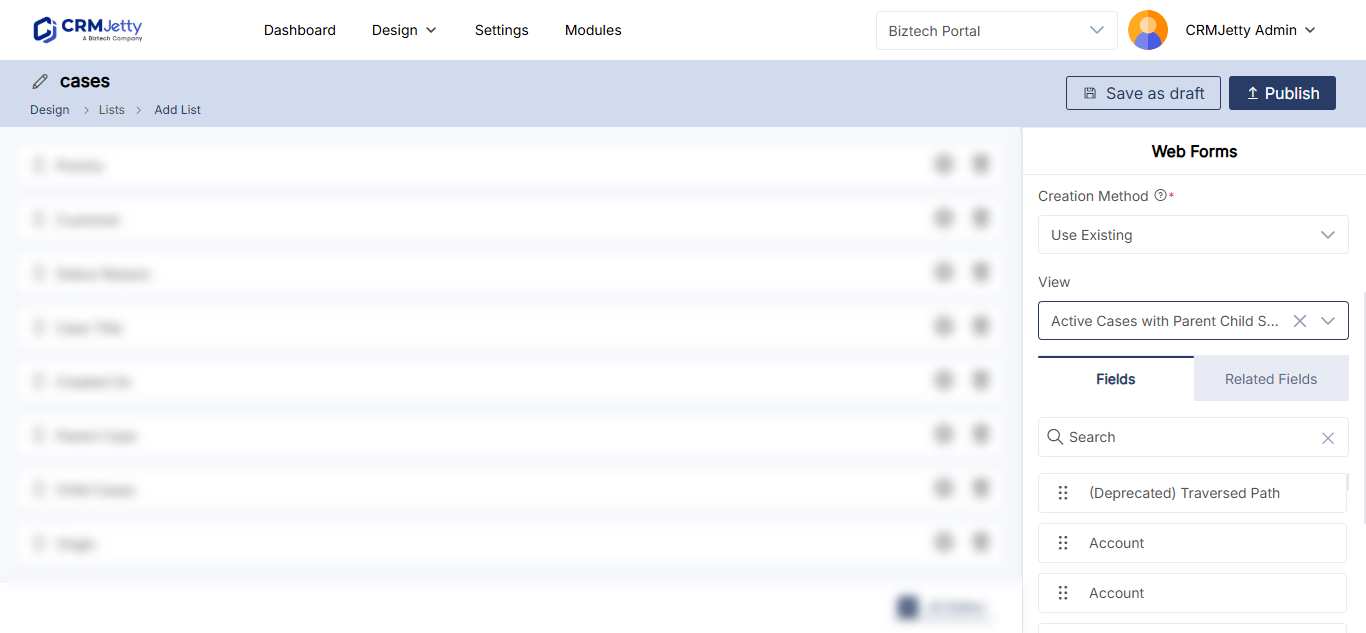
- With Use Existing selected, choose a view in the View drop-down.
- The fields of that view, as configured in your CRM, are added to the list automatically.
- Add, remove or reorder fields as needed.
For more on reusing CRM views, see How to Use Existing CRM Forms and Views in the Portal.
Configure fields
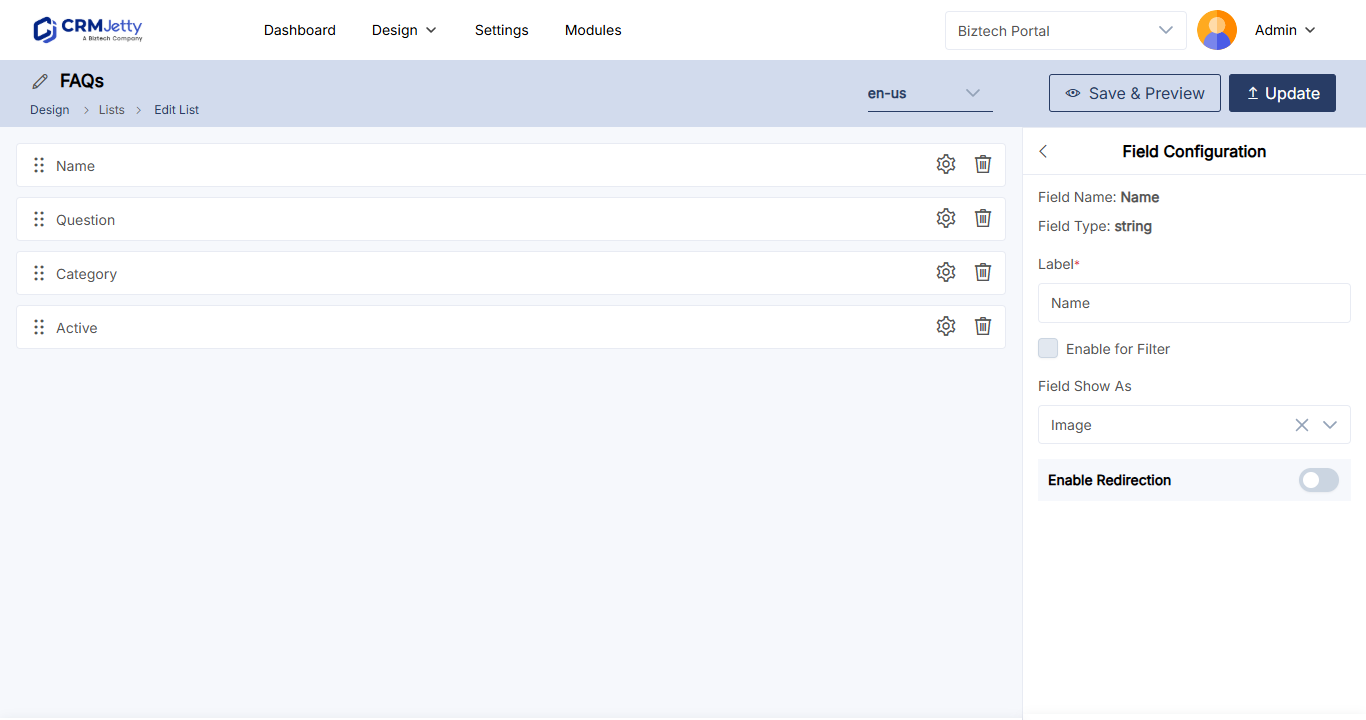
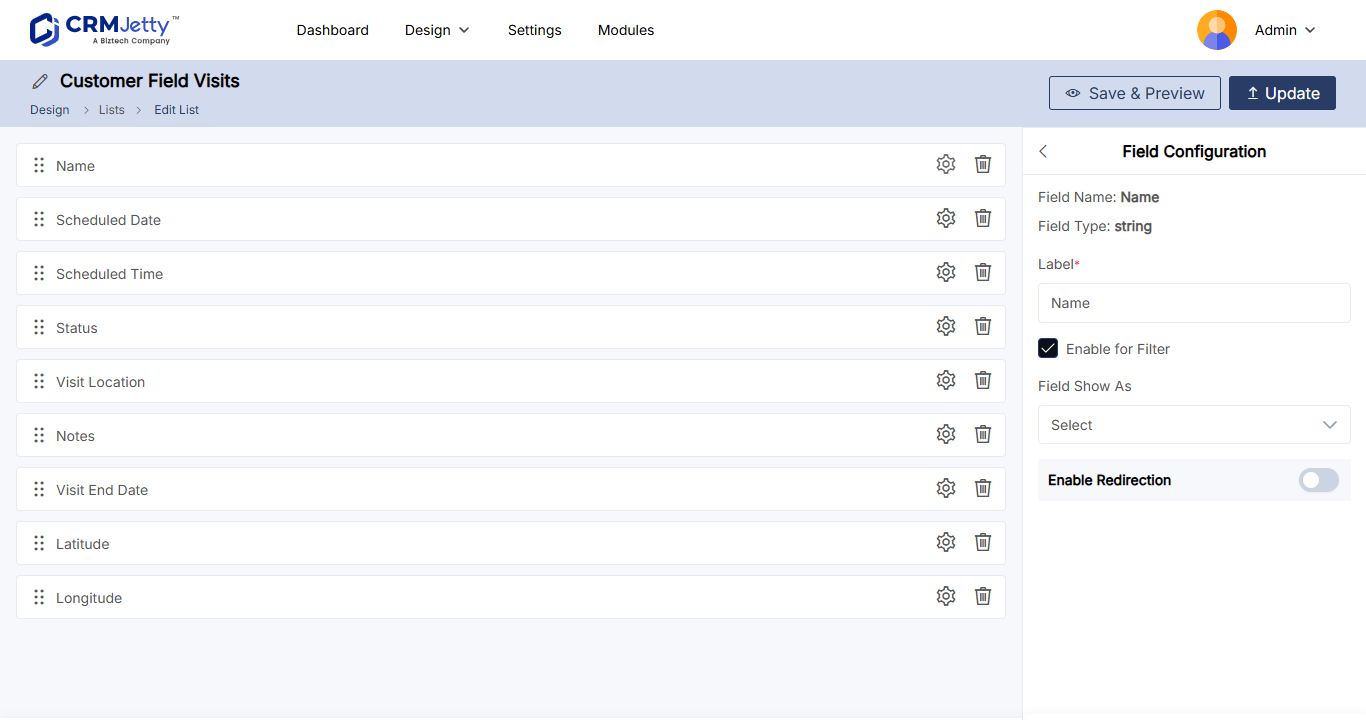
Select the Settings icon on a field to open its field configuration. It shows the field name and data type, and lets you change the label. Select Save after you change a field.
To remove a field, select its Delete icon. You can remove any field except required fields.
| Setting | What it does |
|---|---|
| Label | The column heading portal users see. |
| Enable for Filter | Lets portal users search and filter the list by this field. See How to Add Filters to Portal List Views. |
| Show as Image | Shows a string value as an image. See How to Show Images in Portal List Views. |
| Field Show as → HTML | Shows a string value as HTML. Make sure the value holds valid HTML, or a placeholder is shown instead. |
| Enable Rating | Shows a number field (Integer, BigInt, Decimal or Double) as a rating with star or thumbs icons in the color you pick. |
| Redirection | For String fields: turns the value into a link. See Link a field to a page or URL. |
Link a field to a page or URL
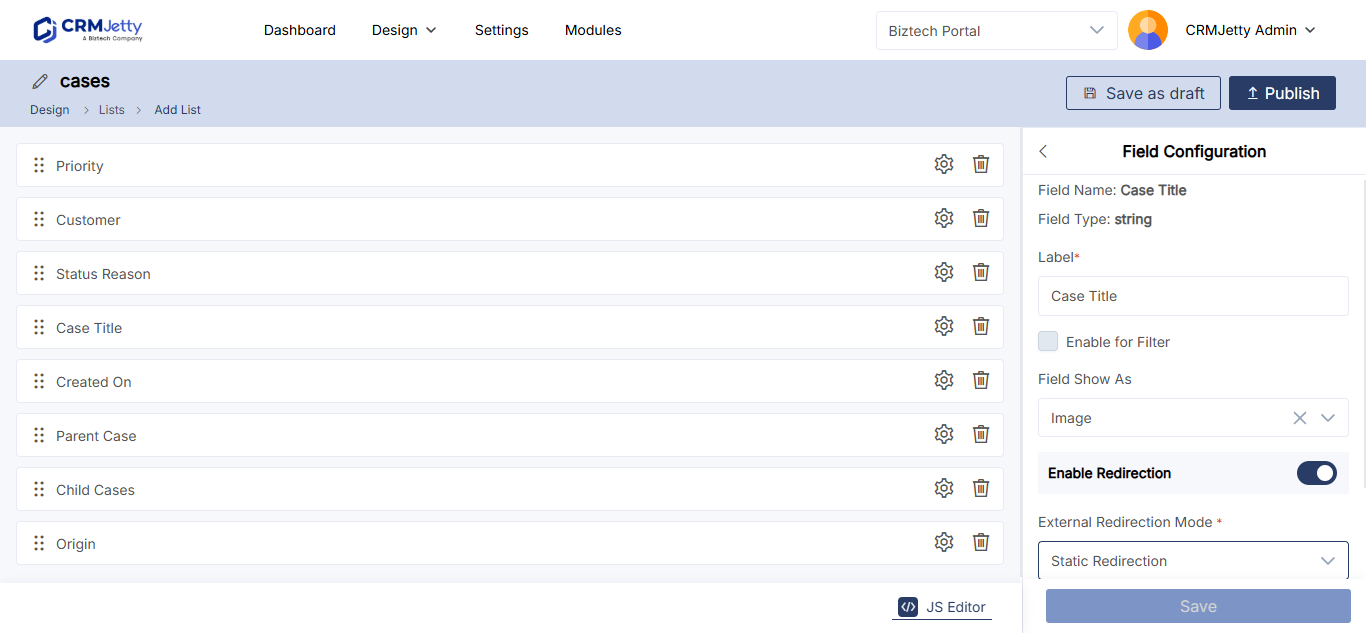
For a String field, turn on Redirection to make its value clickable in the list or a Data Card. Then choose a Select Redirection Mode:
| Mode | What to set |
|---|---|
| Internal Redirection | Choose an internal portal page. Then select the Account Internal Redirection Page and Contact Internal Redirection Page. |
| External Redirection | Choose an External Redirection Mode: Static Mode to enter a fixed URL in Static Redirection (an internal link or a third-party URL), or Dynamic Mode to select the External Redirection (Dynamic) field so the link comes from the record. |
| Target Entity Redirection | Select a target field of the entity, then select Account and Contact. Portal users go to the selected record. |
Other list options
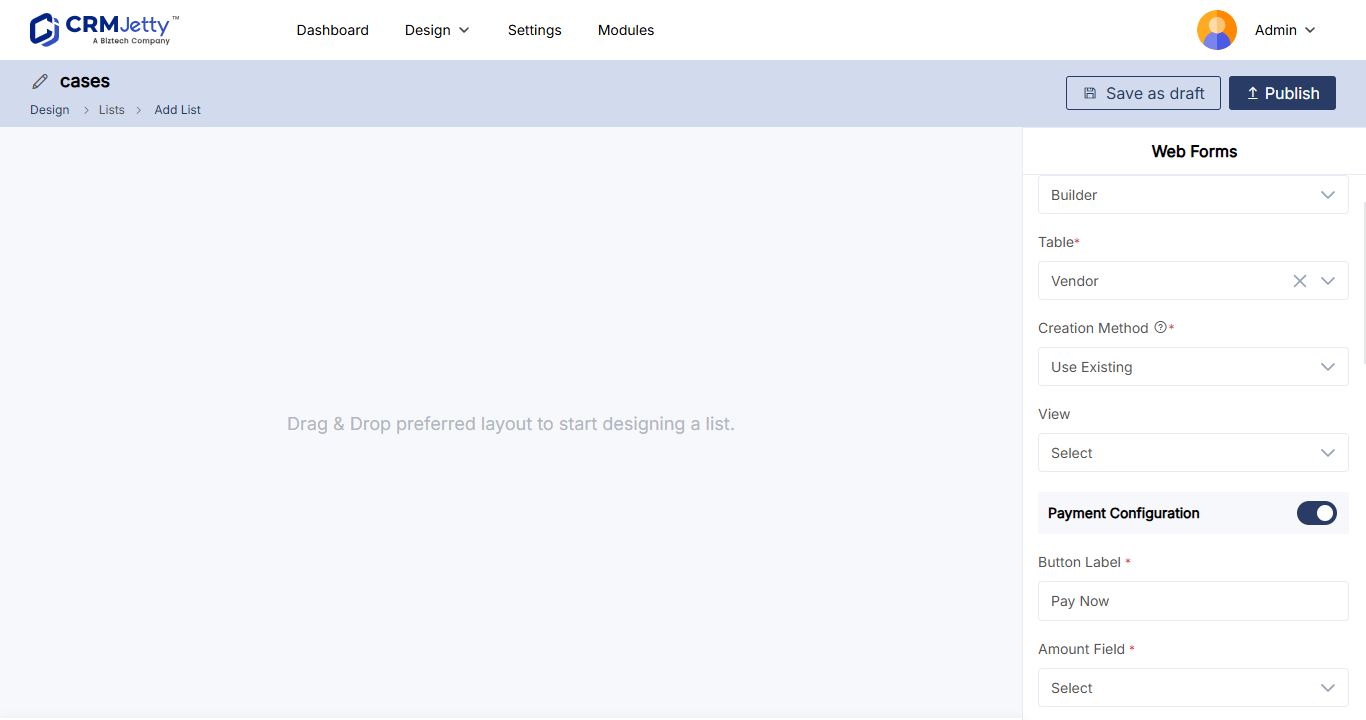
- Payment: turn on Enable Payment to show a pay option on records of entities that have an Amount (Currency) field. Online payments are available on selected plans. See How to Add a Pay Now Button to Portal Records.
- JavaScript: select JS Editor to change the list layout with your own code. See How to Add Custom JavaScript to the Portal.
- Languages: translate the list into your enabled languages. See How to Translate Portal Forms and Lists.
Save or publish the list
When the list is ready, select one of these:
| Button | Result |
|---|---|
| Save As Draft | Saves the list for editing and review. Portal users can’t see it, and you can’t select it in a List widget. |
| Publish | Makes the list final. You can now select it in the List widget in Page Builder. |
Show the list on a portal page
A list appears in the portal only when you add it to a page.
- Go to Design → Page Builder and open the page, or create one.
- Add the List widget to a grid.
- Select the Settings icon on the widget.
- Enter a List Title.
- In Select List Entity, select your published list.
- Set Record Per Page and Select Ordering Field.
- Set the create, edit and detail actions if portal users should open records from the list.
- Select Save, then publish the page.
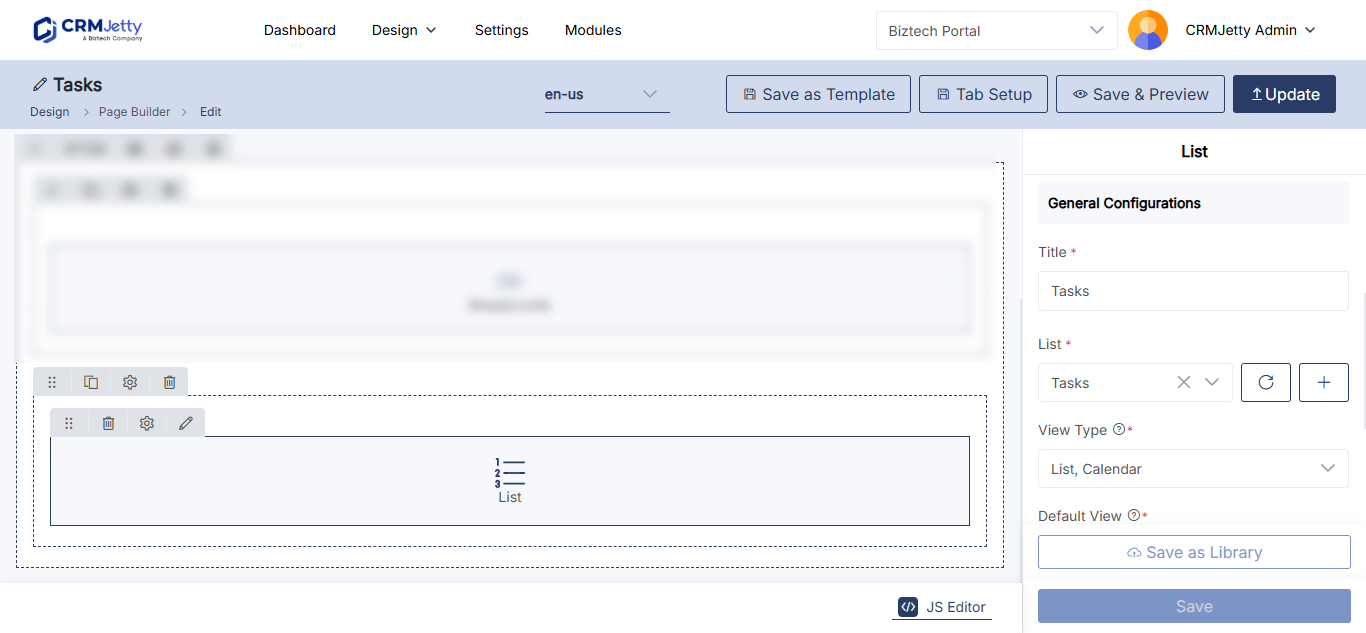
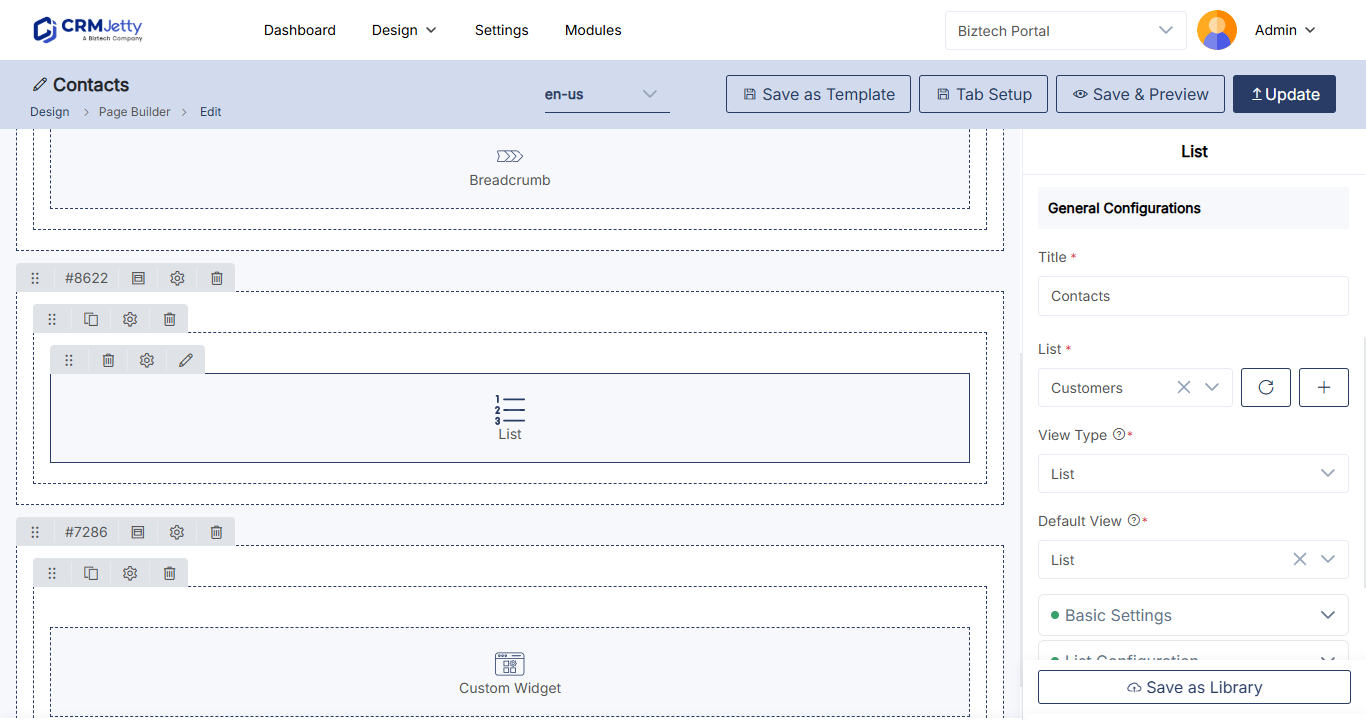
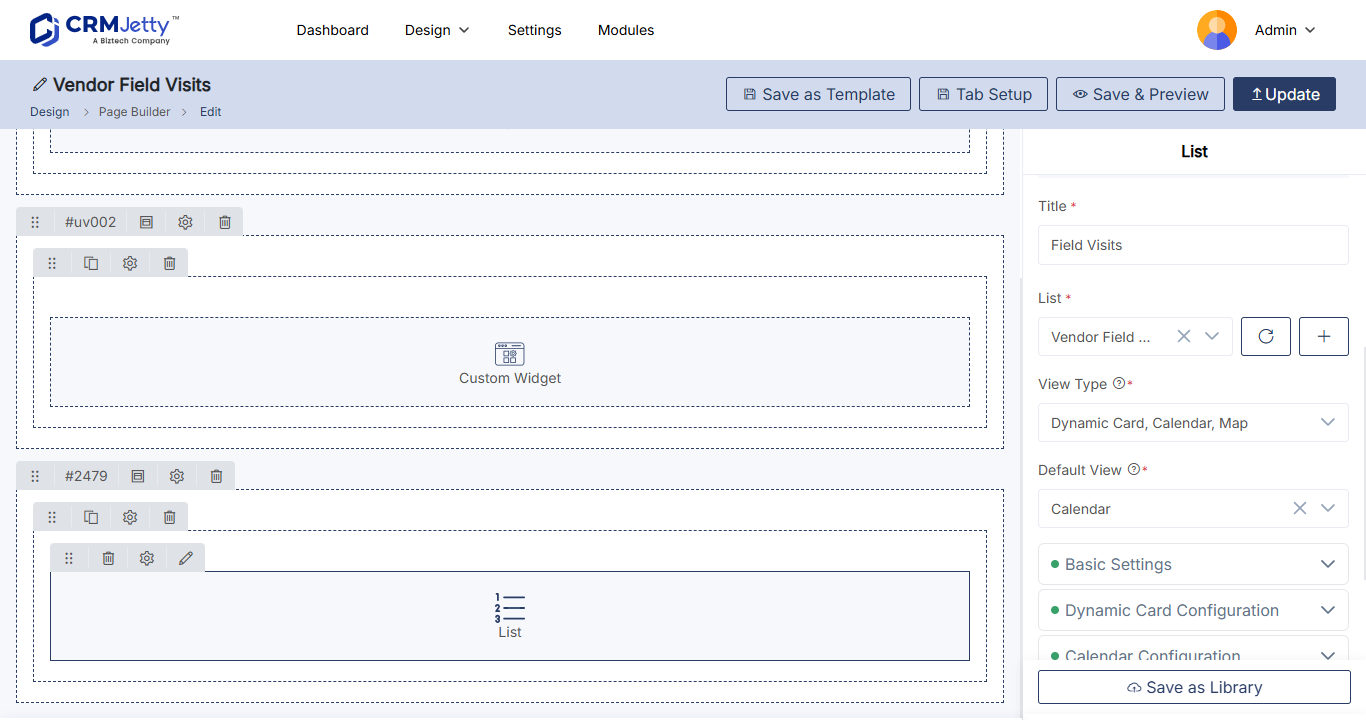
The List widget can also show the same records as a Data Card, Dynamic Card, Calendar or Map view. See How to Show Records in Kanban, Calendar or Map View.
For more on building pages, see How to Create Pages in CRMJetty Portal.
Manage lists
In Design → Lists, select the three dots (…) next to a list to use these actions:
| Action | What it does |
|---|---|
| Edit | Opens the list so you can change its fields and settings. Select Update to save. |
| Preview | Shows the list layout as portal users will see it. You can’t select fields or change content in the preview. The list must be saved as a draft or published first. |
| Duplicate | Copies the list and adds it as “List name - Copy”, for example Orders - Copy. |
| Publish / Draft | Publishes a draft list, or moves a published list back to draft. |
| Translate | Translates the list into a language. |
| Delete | Deletes the list after you confirm with OK. |
To act on several lists at once, select their checkboxes, open the bulk action menu and choose Publish, Duplicate or Delete.
Note: You can move a list back to draft only if it is not used on a page. If you bulk publish a selection that mixes draft and published lists, all of them become published.
Troubleshooting
The list doesn’t appear in the List widget: The list is still a draft. Publish it, then select it again in the widget.
An entity is missing from the Entity drop-down: The entity is not enabled for the portal. Enable it, then create the list. See How to Enable CRM Entities and Custom Objects in the Portal.
A new CRM field is missing from the field list: Sync your CRM layout changes to the portal, then add the field. See How to Sync CRM Layout Changes to Your Portal.
You can’t move a list to draft: The list is used on a page. Remove it from the page first.
Related articles
- How to Add Filters to Portal List Views
- How to Show Images in Portal List Views
- How to Show CRM Records as Cards in the Portal
- How to Filter Which Records Portal Users See