
How to Let Portal Users Delete Records in Bulk
Portal users can clean up records they no longer need, such as old draft orders or duplicate contacts, by selecting several records in a list and deleting them in one step. Two settings must both allow it: the portal user’s role and the List widget that shows the records.
Important: A record deleted from the portal is also deleted in your CRM. Records that your CRM’s deletion rules block (for example, a contact linked to other records) stay, and the portal shows the CRM’s error. The portal user also needs Delete permission on that record type. Deletion can’t be undone from the portal, so test on a sandbox or a few non-critical records before you turn this on for portal users.
Before you start
- You need admin access to the CRMJetty admin portal.
- Show the records in a list on a portal page. See How to Create List Views in CRMJetty Portal.
- Decide which roles may delete records. Deletion can’t be undone from the portal.
Give the role Delete permission
- Go to Settings → User Settings → Portal User Roles.
- Select the three dots (…) next to the role, then select the Edit icon.
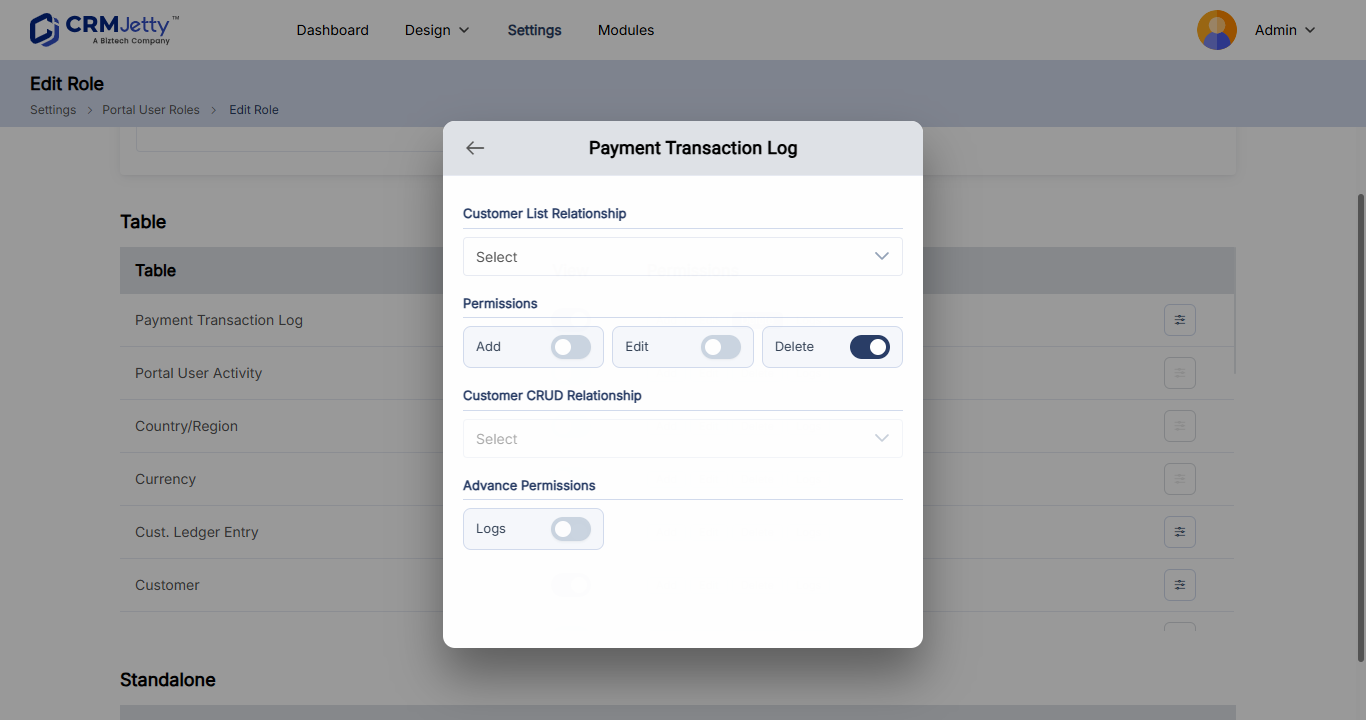
- In Entity Permissions (Business Central: Table Permissions), find the entity.
- Select View, then select Delete.
- Select Save.
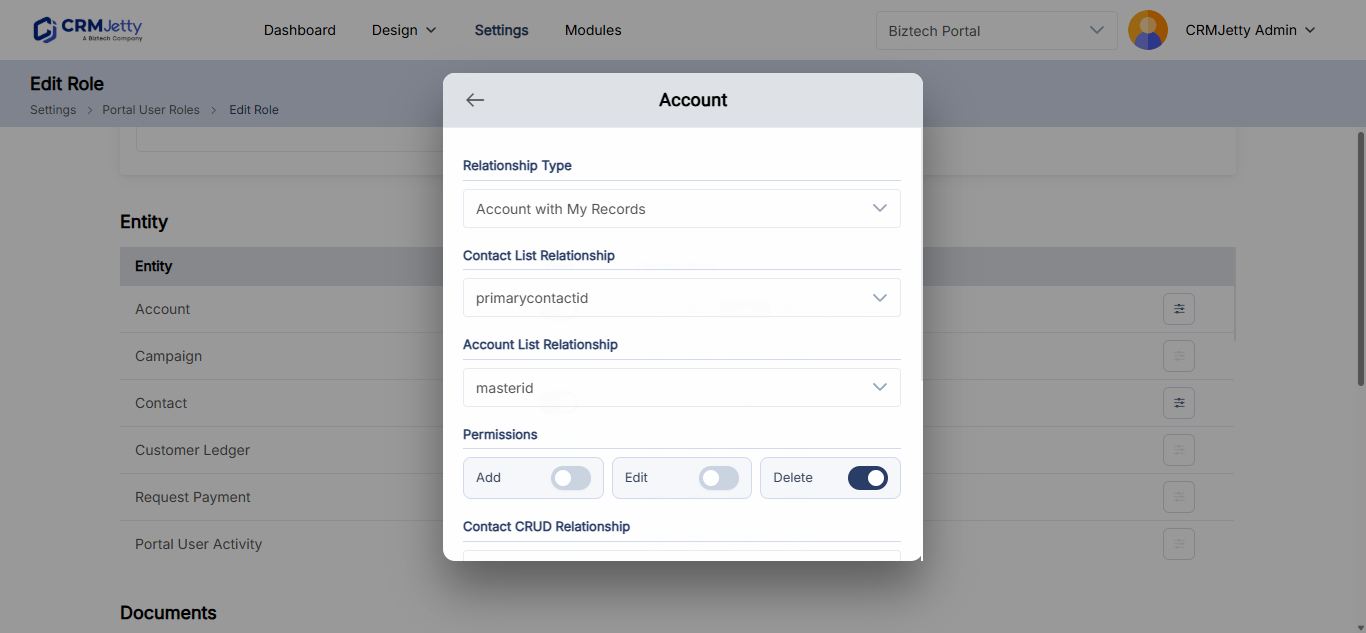
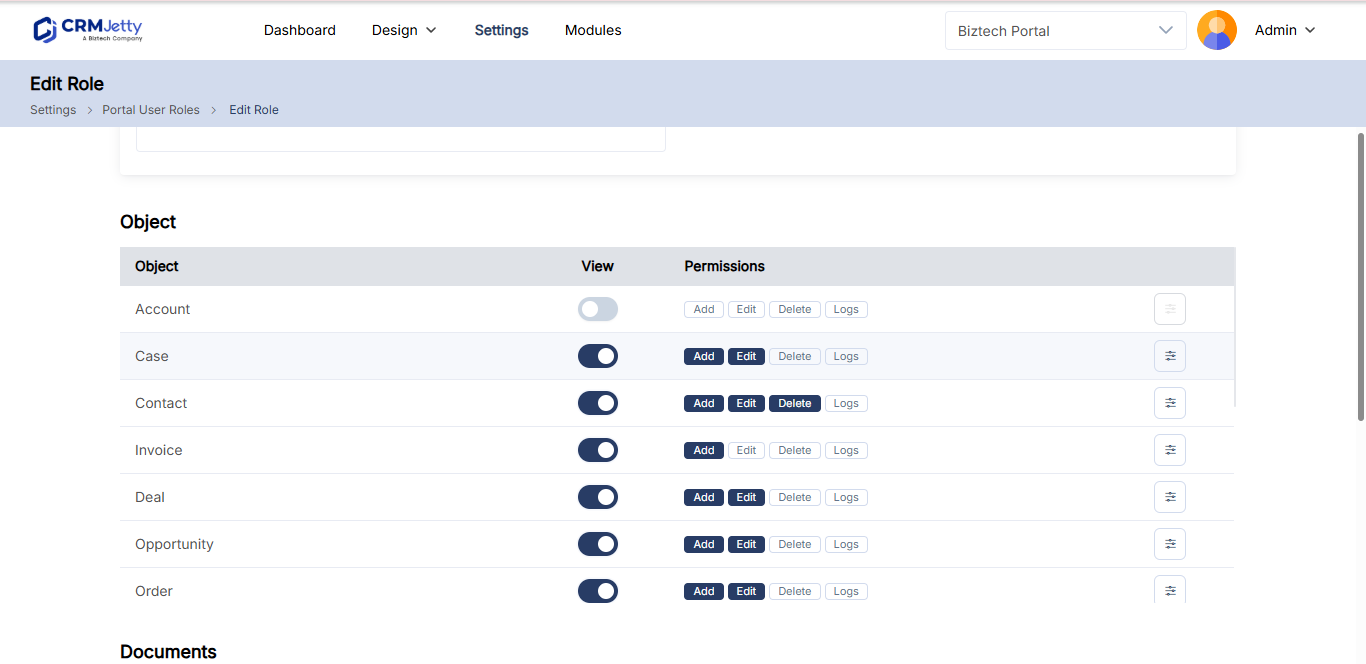
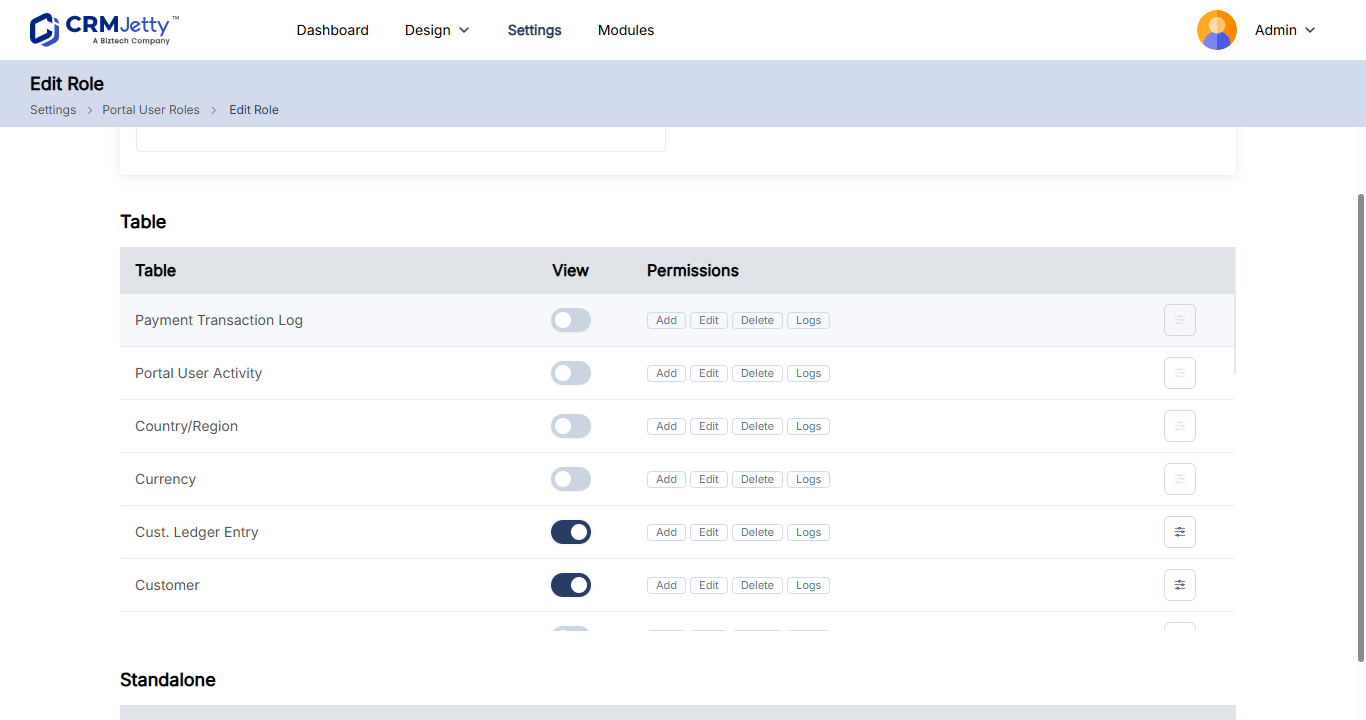
For details, see How to Set Add, Edit and Delete Permissions by Role.
Turn on deletion in the List widget
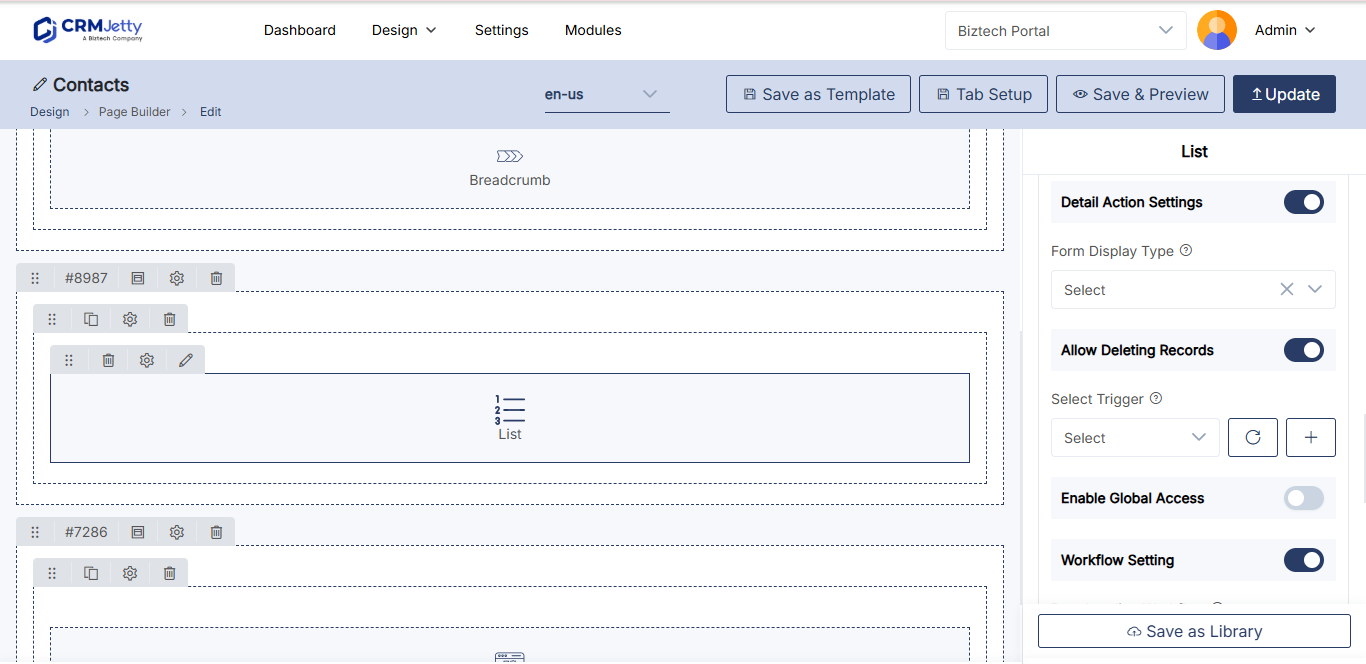
- Go to Design → Page Builder and open the page with the list in edit mode.
- Select the Settings icon on the List widget.
- Under Allow Deleting Records, turn on the Deleting toggle.
- Optional: in Select Trigger, choose a trigger to run when a portal user deletes records, for example to notify your team.
- Select Save.
- Publish the page.
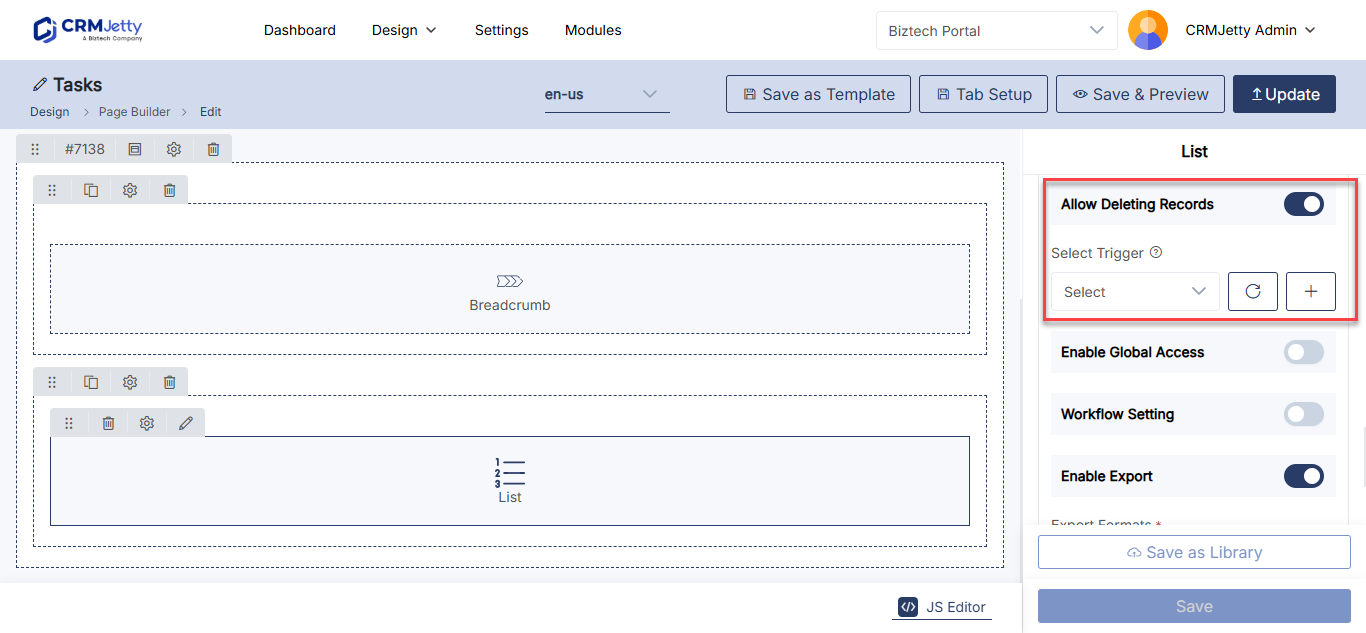
For how to set up the trigger, see How to Automate Portal Emails with Triggers.
How portal users delete records
- Open the page with the list.
- Select the checkbox next to each record to delete.
- Select Delete.
Important: Treat a delete from the portal as permanent. The portal works on your CRM records directly; it doesn’t keep a separate copy to restore from.
Stop deletion for some records
The role’s Delete permission covers every record of the entity the user can reach. To block deletion only for certain records, for example closed cases, add an Update Assigned Rights workflow in Settings → Portal Settings → Workflow Management and select it in the List widget’s Update Assign Rights Workflow setting.
See How to Restrict Record Access with Conditional Workflows.
Troubleshooting
Portal users don’t see a Delete option: Check both settings. The role needs Delete on the entity, and the List widget needs Deleting turned on. Publish the page after you change the widget.
Some records can’t be deleted: An Update Assigned Rights workflow may disable deletion for those records.
Related articles
- How to Set Add, Edit and Delete Permissions by Role
- How to Create List Views in CRMJetty Portal
- How to Restrict Record Access with Conditional Workflows
- How to Let Portal Users Export Records to CSV