
How to Add Portal Users from CRM Contacts
Portal users are CRM contacts who can sign in to your portal. You manage them in one list in the admin portal, and you can give access to contacts that already exist in your CRM or create new ones.
Before you start
- You need admin access to the admin portal. Sub-admins can add contacts only if their admin role allows it.
- Connect your CRM and set up SMTP email, so the portal can send access emails. See How to Configure SMTP Email in CRMJetty Portal.
- Create the roles you want to assign. See How to Create Portal User Roles and Permissions.
- The fields shown in the portal user list and on the Create form come from Portal User Settings. See How to Configure Portal User Settings and Layouts.
- In Business Central, customer and vendor contacts are managed on separate pages, Settings → User Settings → Portal User Customer and Portal User Vendor. See How to Set Up Customers in Business Central Portal and How to Set Up a Business Central Vendor Portal.
Where portal users come from
Go to Settings → User Settings → Portal User Setup. The list shows contacts from three sources:
| Source | How the contact was created |
|---|---|
| CRM | Created in your CRM. |
| Admin portal | Created by an admin with Create on this page. |
| Website | Registered through the portal’s registration page. |
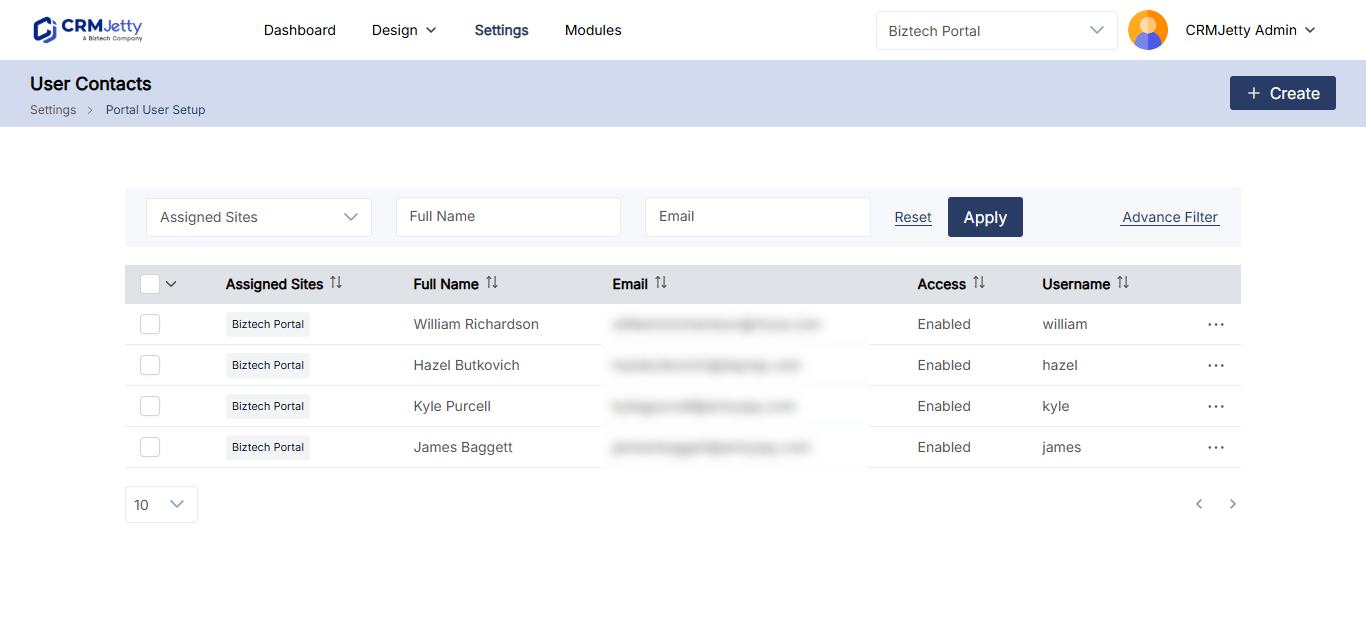
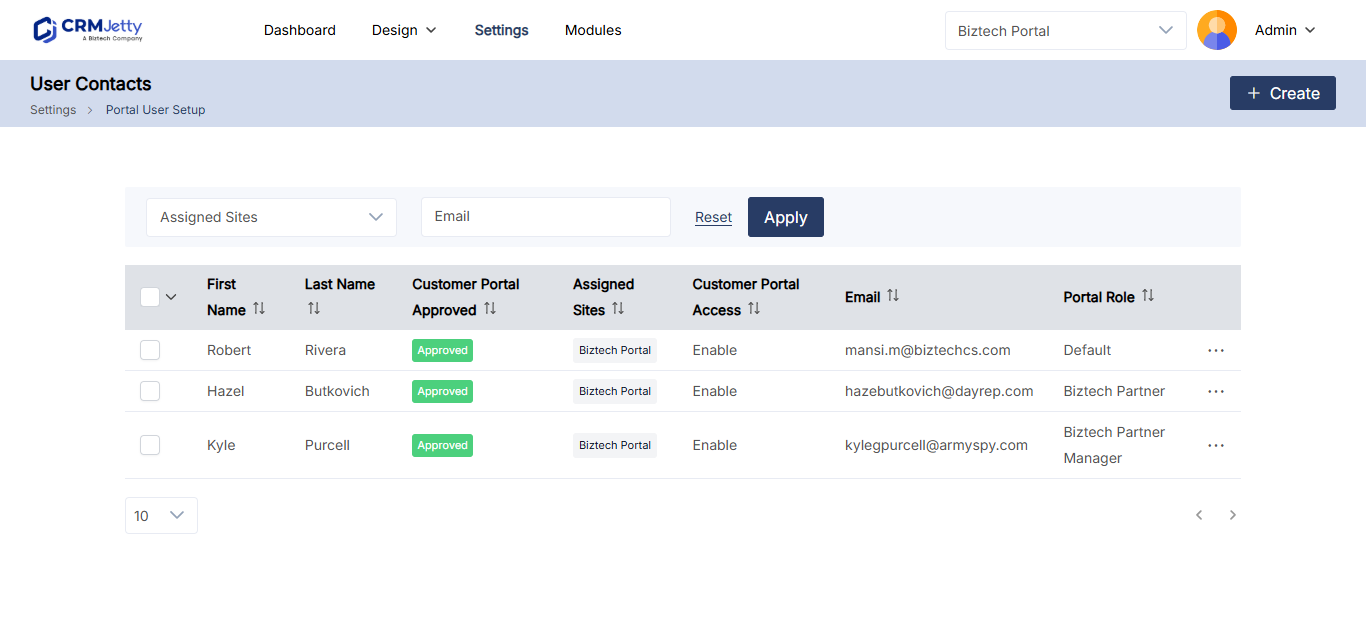
Give existing CRM contacts portal access
- Go to Settings → User Settings → Portal User Setup.
- Select the contacts you want to give access to. You can select one or several.
- In the Bulk Actions menu, select Enable.
- In the pop-up, select the role whose permissions these users get.
- Select Save.
- Review the summary: Selected User, Disabled Users and Conversion Pending.
- Select Apply to generate credentials and enable access.
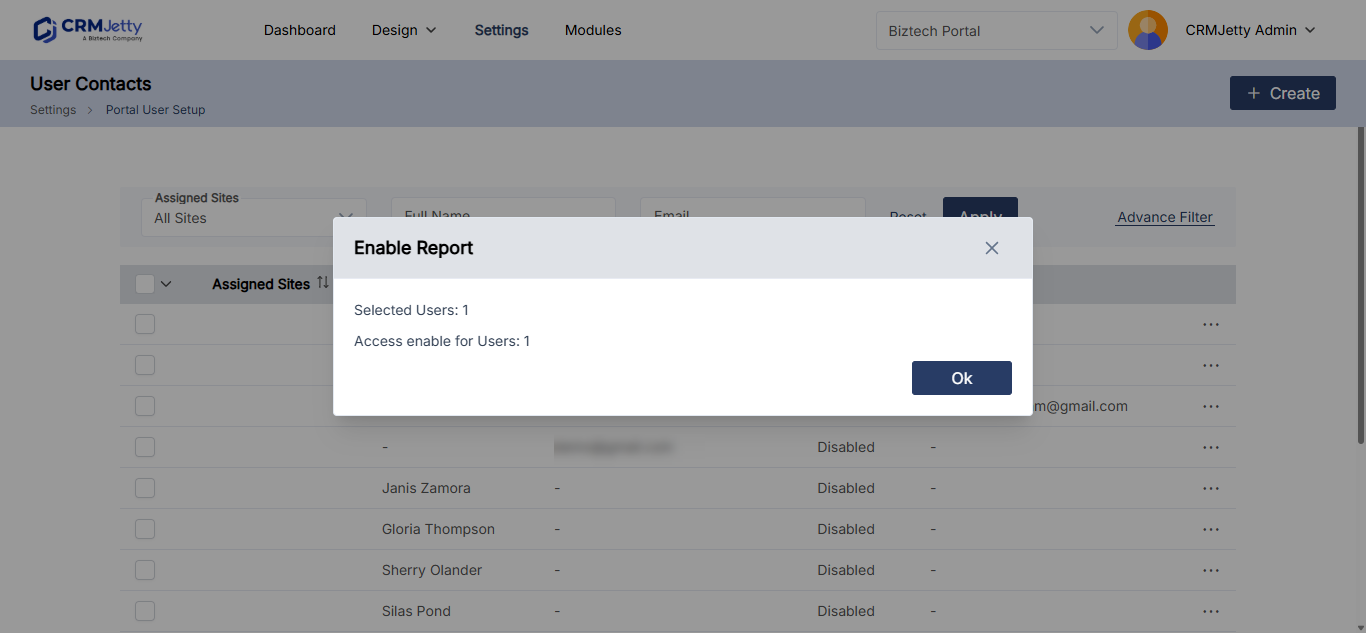
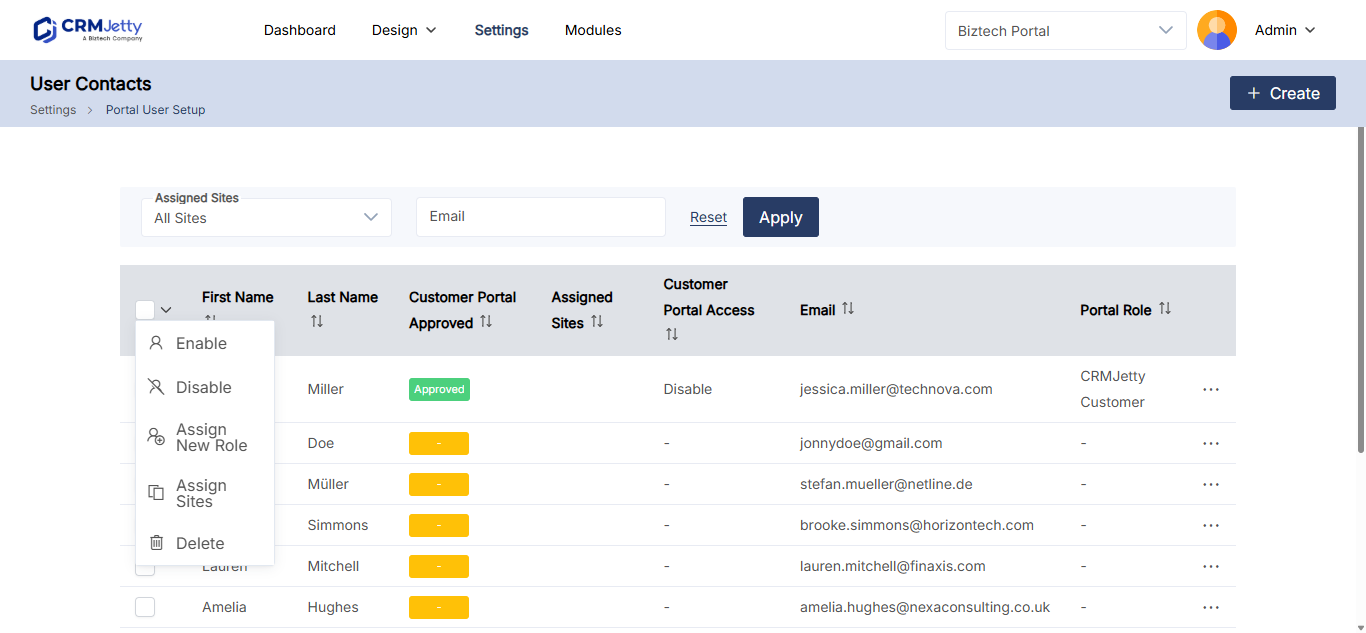
The contacts receive an email with a link to access the portal and set a password. You can also use Enable to restore access for contacts you disabled earlier.
For more on bulk credential generation, see How to Generate Portal Login Credentials in Bulk.
Create a new contact from the admin portal
A contact you create here is also created in your CRM.
- Go to Settings → User Settings → Portal User Setup.
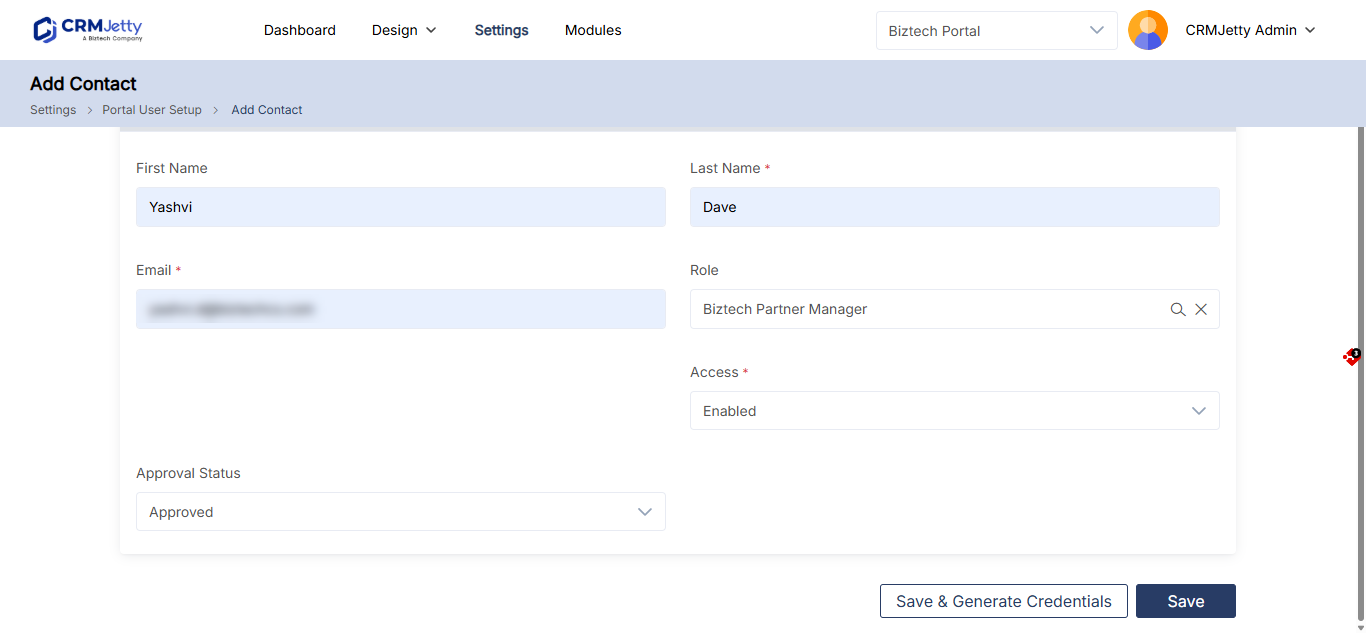
- Select Create. The Create Contact page opens.
- Enter the portal contact details. Fill in all mandatory fields.
- In Role, select a role. If you don’t select one, the contact gets the Default role.
- Set the approval status.
- Select how to save:
- Save: creates the contact without sending a verification link.
- Save & Generate Credentials: creates the contact and emails them a verification link to access the portal.
| Approval status | Save button | Result |
|---|---|---|
| Approved | Save | The contact is approved, but credentials are still pending. |
| Approved | Save & Generate Credentials | The contact is approved and receives an email with the portal access link. |
| Not Approved | Save | The contact is created without access. You can approve them and generate credentials later from the contact list. |
Note: Portal users are managed only in the CRMJetty admin portal. CRM user roles have no effect on portal user roles.
Troubleshooting
A contact didn’t receive the access email: Check your SMTP settings and send a test email. Then select the contact and choose Send Password Link from the Bulk Actions menu.
A new contact is missing fields on the Create Contact page: The form comes from Portal User Settings. Add the fields there.
Related articles
- How to Generate Portal Login Credentials in Bulk
- How to Edit Portal User Details
- How to Approve Multiple Portal Users at Once
- How to Assign Roles to Portal Users in Bulk
- Do Portal Contact Changes Sync Back to the CRM?