
How to Set Up Salesforce JWT Authentication for the Portal
JWT authentication uses the OAuth 2.0 JWT bearer flow: the portal connects to Salesforce with a digital certificate instead of an interactive sign-in. You generate a private key and certificate, then upload the certificate to a Salesforce external client app.
Before you start
- You need Salesforce admin access to create an external client app and manage profiles.
- Your Salesforce edition must have API access: Enterprise, Unlimited, Performance or Developer. Professional Edition needs API access enabled.
- Install OpenSSL on the computer where you generate the keys.
- Review CRM Connection Requirements for CRMJetty Portal.
- For orgs that still use connected apps, see How to Set Up a Salesforce Connected App for the Portal.
Generate the private key and certificate
-
Create a folder named
JWT. -
Open a command-line terminal in the
JWTfolder. -
Generate a pass key:
openssl genrsa -des3 -passout pass:YOUR_PASSPHRASE -out server.pass.key 2048 -
Generate the private key:
openssl rsa -passin pass:YOUR_PASSPHRASE -in server.pass.key -out server.key -
Generate a certificate signing request. This command asks for details, so enter valid values when prompted:
openssl req -new -key server.key -out server.csr -
Generate the x509 certificate:
openssl x509 -req -sha256 -days 365 -in server.csr -signkey server.key -out server.crt -
Generate the public key:
openssl x509 -pubkey -noout -in server.crt > pubkey.pem
The folder now contains five files:
| File | What it is |
|---|---|
server.pass.key |
Pass-protected key used to create the private key |
server.key |
Private key |
server.csr |
Certificate signing request |
server.crt |
x509 certificate, valid for 365 days. You upload this to Salesforce. |
pubkey.pem |
Public key |
Note: Replace
YOUR_PASSPHRASEwith a passphrase of your own and use the same one in steps 3 and 4.
Important:
server.keyis an unencrypted private key. Store it securely and do not share it or commit it to source control.
Important: The certificate is valid for 365 days (
-days 365). Generate a new certificate and upload it to the external client app before it expires.
For more detail, see Salesforce’s guide: Create a Private Key and Self-Signed Digital Certificate.
Create the external client app with the certificate
Salesforce now creates new integrations as External Client Apps. If your org still uses connected apps, see How to Set Up a Salesforce Connected App for the Portal.
- In Salesforce, go to Setup.
- Type
External Client App Managerin the Quick Find box and select it. - Select New External Client App.
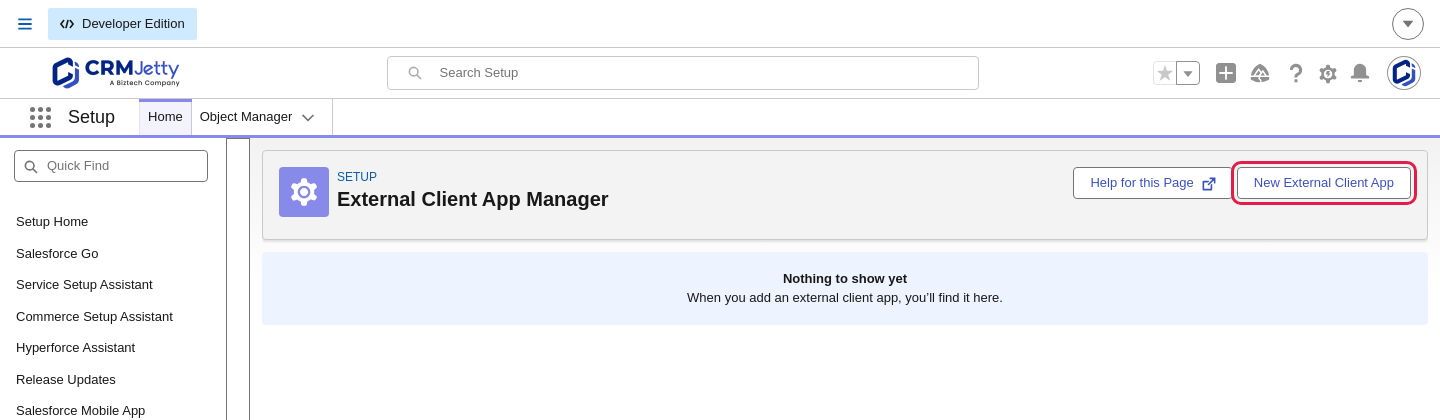
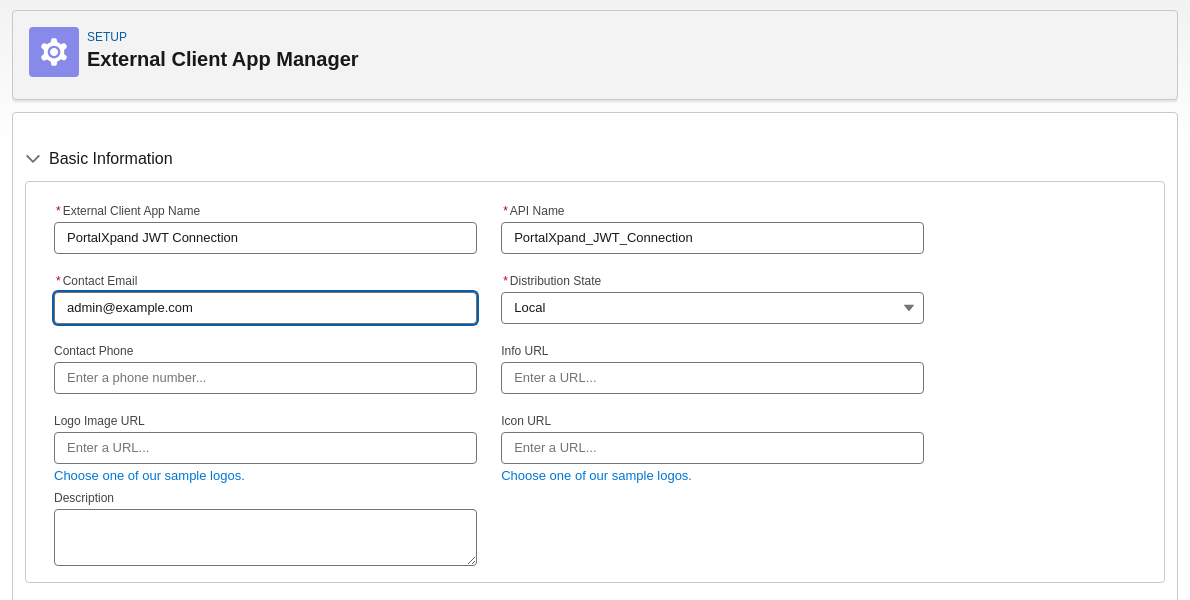
- In the Basic Information section, enter the External Client App Name, API Name and Contact Email. Leave Distribution State as Local.
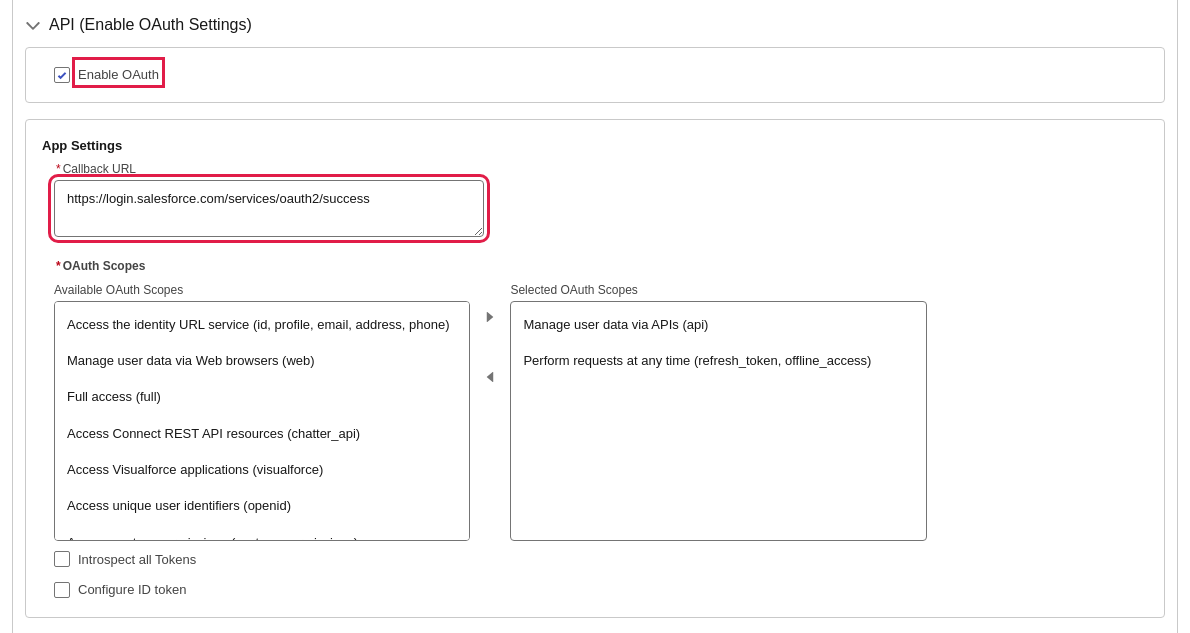
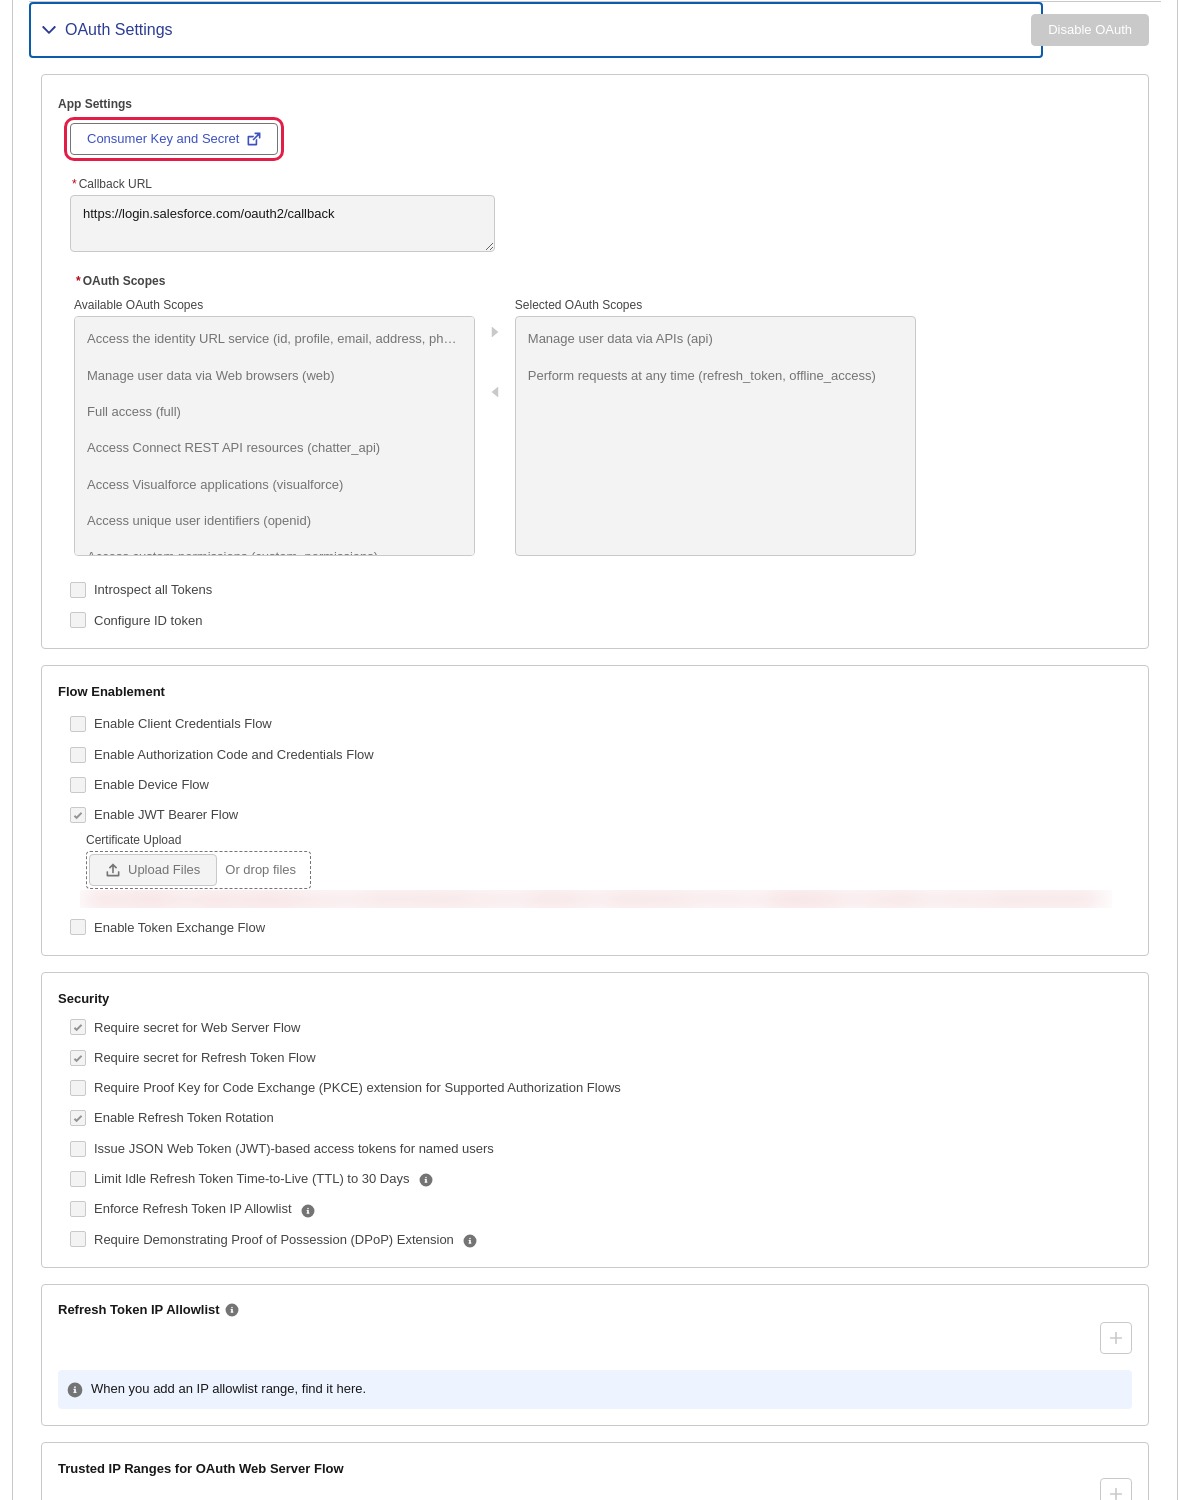
- In the API (Enable OAuth Settings) section, select the Enable OAuth checkbox.
- In Callback URL, enter
https://login.salesforce.com/oauth2/callback. - In OAuth Scopes, move Manage user data via APIs (api) and Perform requests at any time (refresh_token, offline_access) from Available OAuth Scopes to Selected OAuth Scopes.
- In Flow Enablement, select Enable JWT Bearer Flow.
- Under Certificate Upload, select Upload Files and upload
server.crt. - In Security, select Require secret for Web Server Flow and Require secret for Refresh Token Flow.
- Create the app.
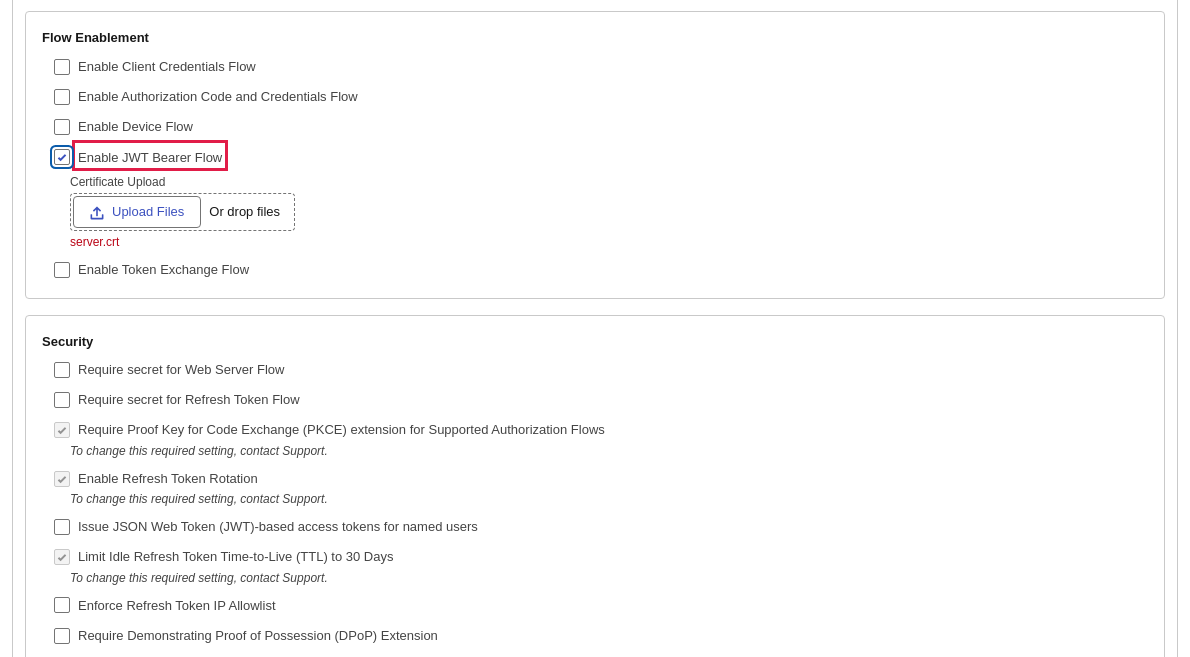
Note: Salesforce locks some settings in this section, such as the PKCE and refresh token rotation checkboxes. To change a locked setting, contact Salesforce Support.
Set the app policies
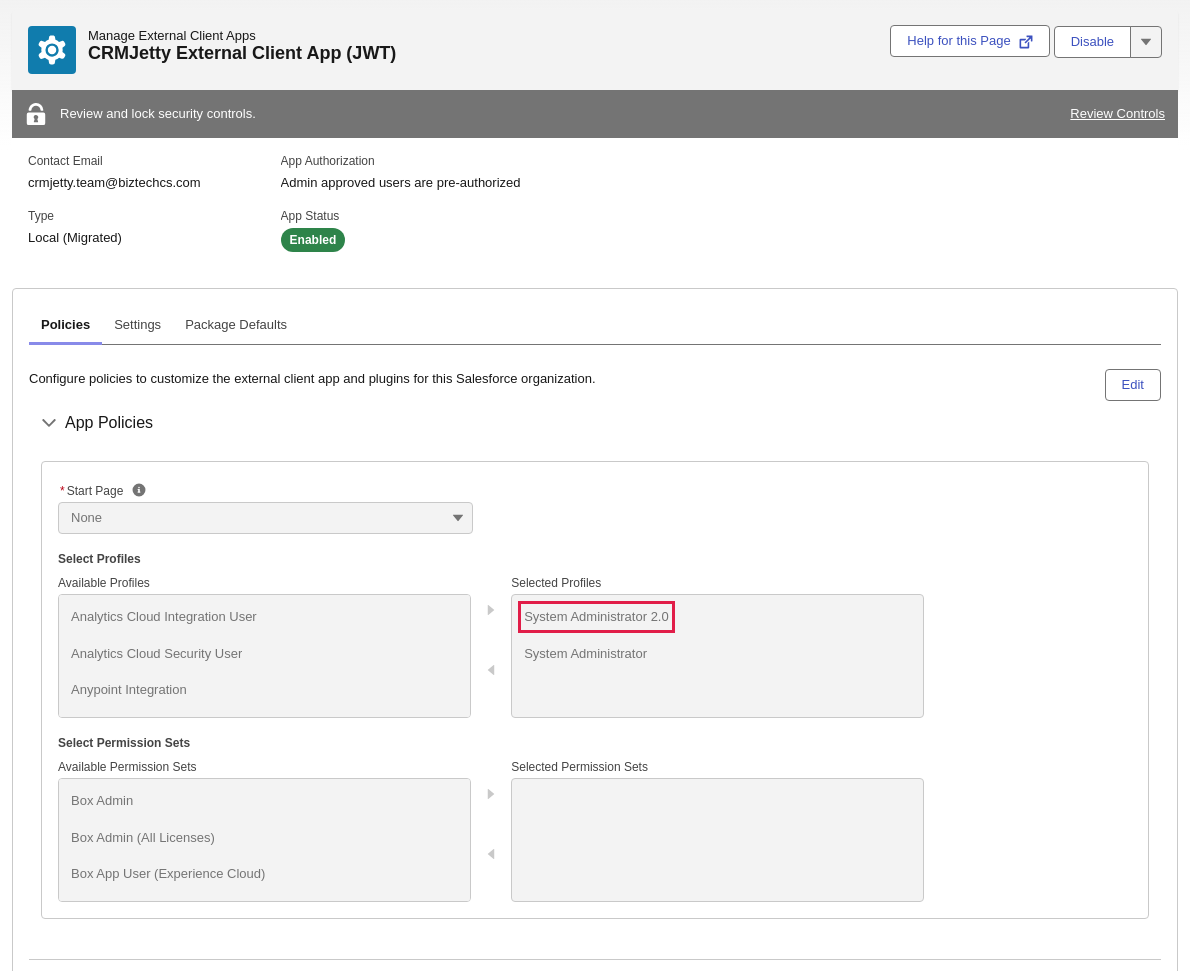
- Open the external client app from External Client App Manager and select the Policies tab.
- Select Edit.
- Under App Policies, move the profile of the Salesforce user the portal connects as, for example System Administrator, to Selected Profiles.
- Expand OAuth Policies.
- Set Permitted Users to Admin approved users are pre-authorized.
- Under App Authorization, set IP Relaxation to Relax IP restrictions.
- Set Refresh Token Policy to suit your security rules, then select Save.
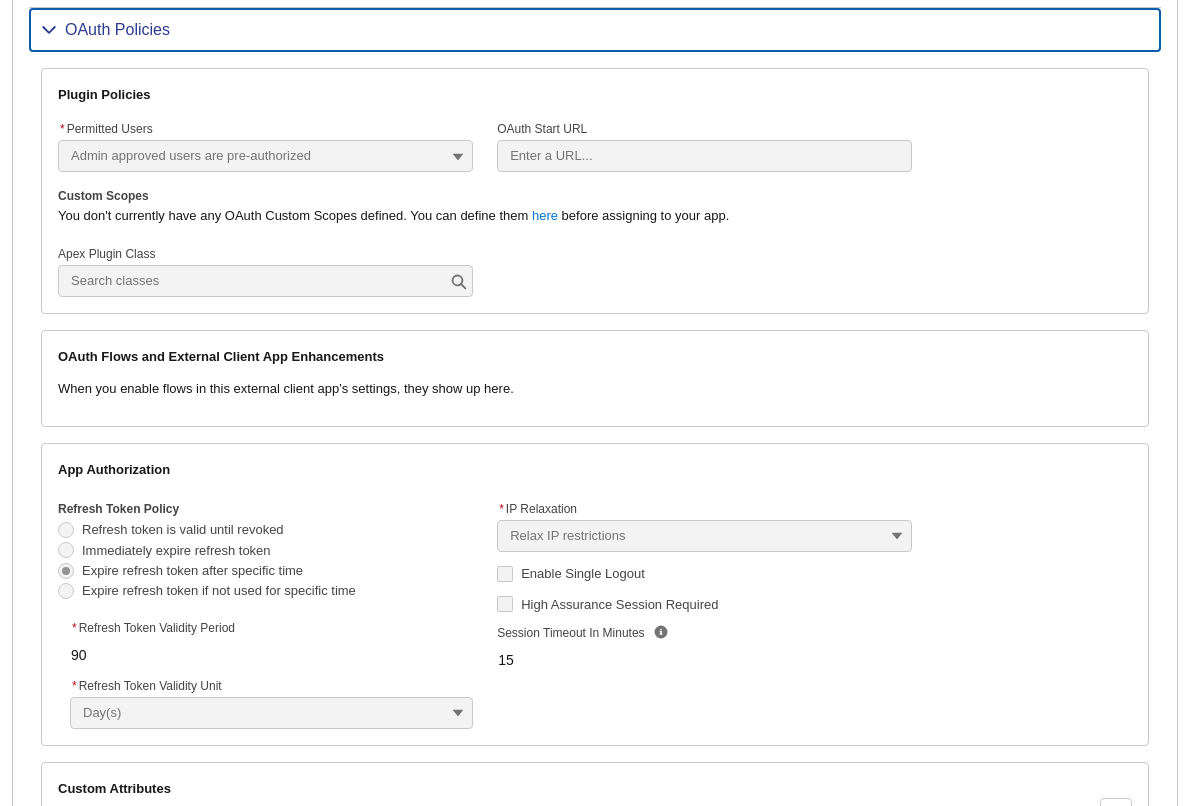
Note: Relaxing IP restrictions lets the app be used from any IP address. If your org enforces IP ranges, add your portal server’s IP addresses instead.
Tip: For tighter control, assign a dedicated integration user’s profile or a permission set instead of System Administrator.
Get the Consumer Key
- Open the external client app and select the Settings tab.
- Expand OAuth Settings and select Consumer Key and Secret.
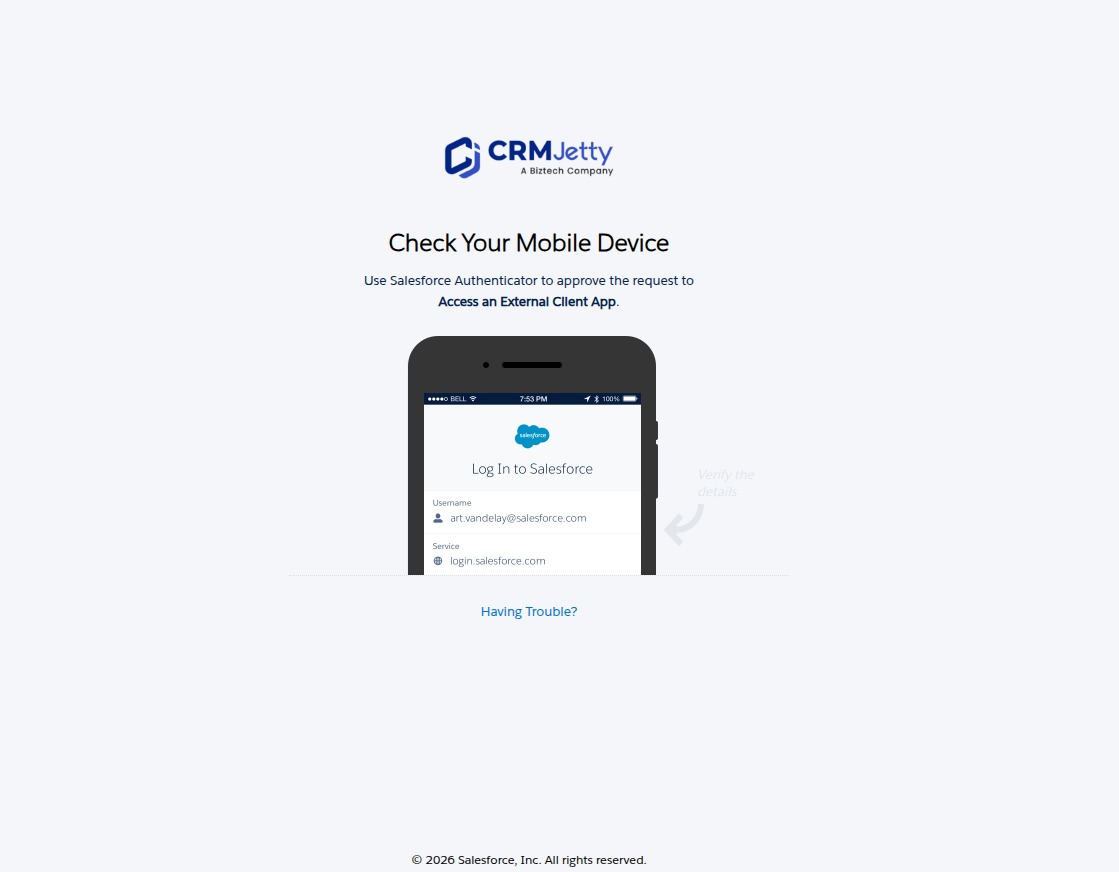
- If Salesforce asks you to verify your identity, approve the request in Salesforce Authenticator or enter the verification code it sends you.
- On the Consumer Details page, copy the Consumer Key.
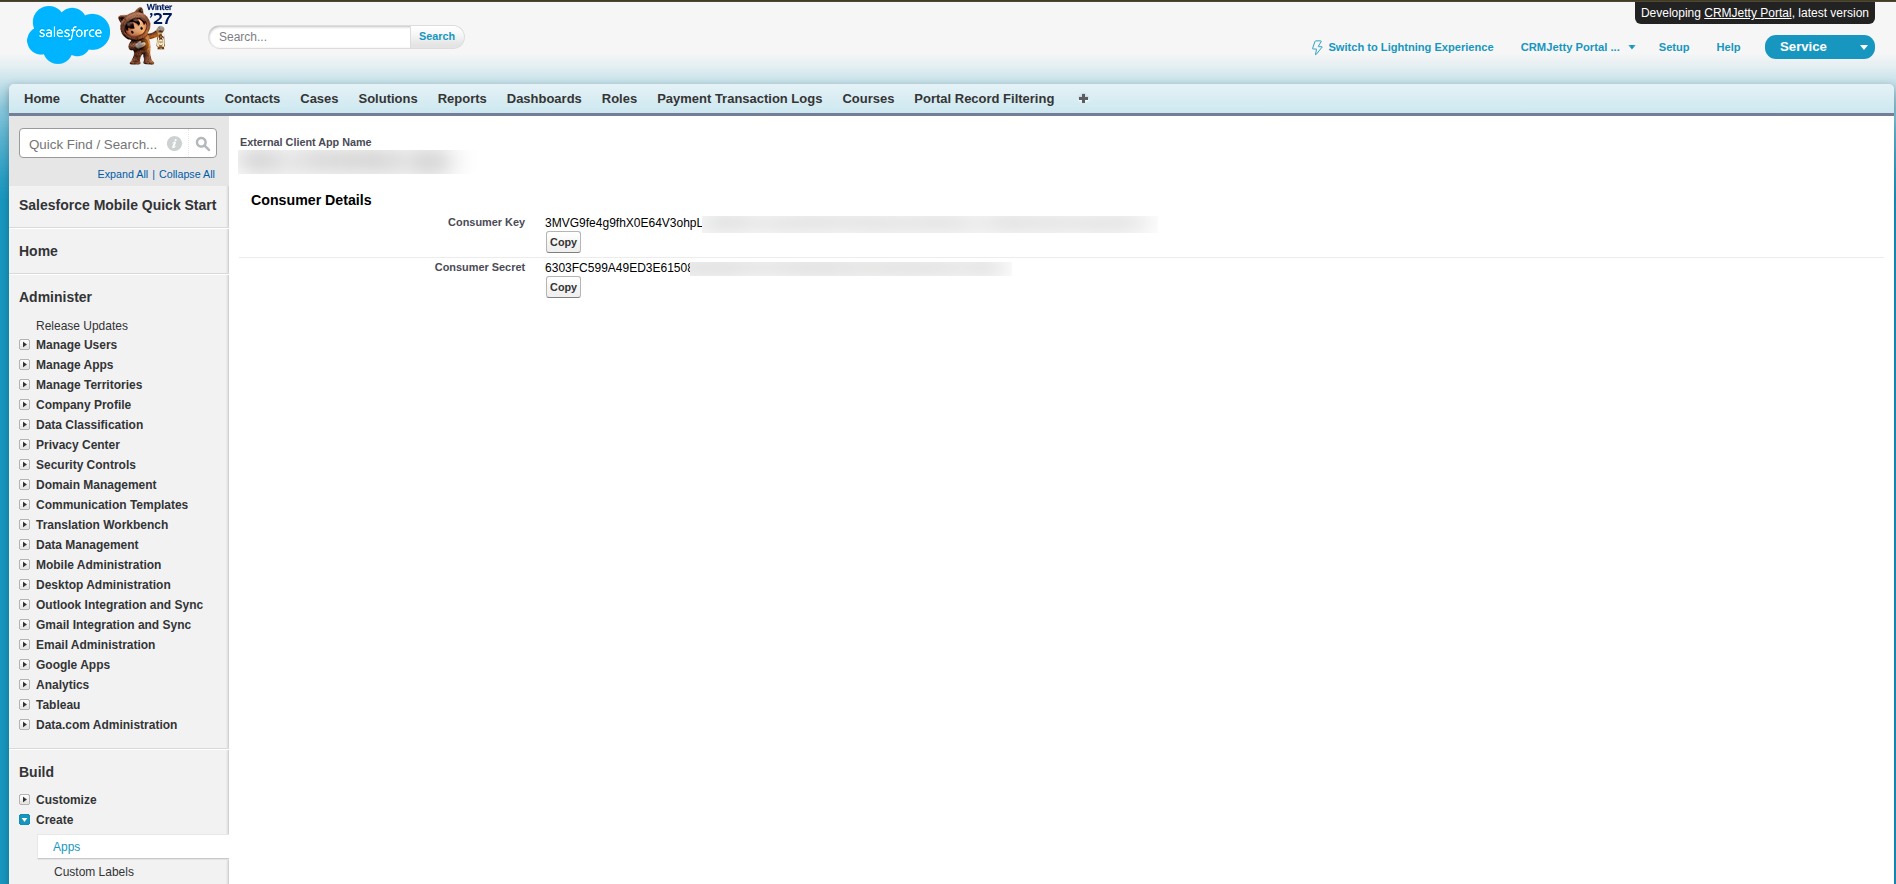
You need the Consumer Key, the Salesforce username the portal connects as, and the server.key private key file to set up CRM authentication in the portal admin under Settings → Portal Settings → CRM Authentication. For where to find each value, see How to Find Your Salesforce Consumer Key and Secret.
Related articles
- How to Find Your Salesforce Consumer Key and Secret
- How to Create a Salesforce Sandbox for Portal Testing
- How to Fix CRM Connection Errors in CRMJetty Portal