
How to Approve Multiple Portal Users at Once
When user approval is turned on, people who register through the portal can’t sign in until an admin approves them. Contacts you save as Not Approved in the admin portal wait for approval too. Approve them in bulk instead of one by one.
Before you start
- You need access to the CRMJetty admin portal with rights to manage portal users. Only admins who have this access can add and approve portal users.
- Turn on user approval if you want new registrations to wait for an admin. See How to Enable Email Verification and Admin Approval.
- A user must exist as a contact before you can approve them. To add contacts, see How to Add Portal Users from CRM Contacts.
- Set up SMTP so approval emails can go out. See How to Configure SMTP Email in CRMJetty Portal.
Where portal users come from
The Portal User Setup list shows contacts created in three ways:
- Contacts created in your CRM.
- Contacts created in the admin portal.
- Contacts who registered through the portal website.
Any of these can be in the Not Approved state and need your approval.
Approve several portal users
- Go to Settings → User Settings → Portal User Setup.
- Find the contacts with the Not Approved status.
- Select the checkbox next to each contact you want to approve.
- Select Approve.
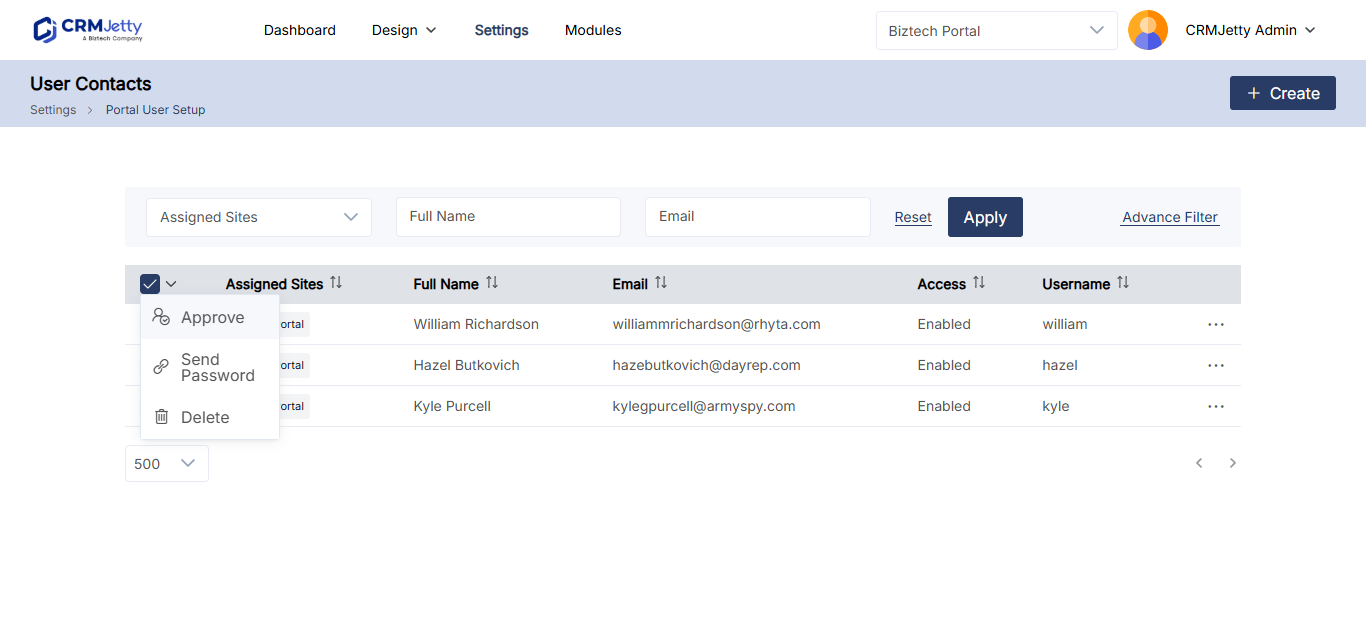
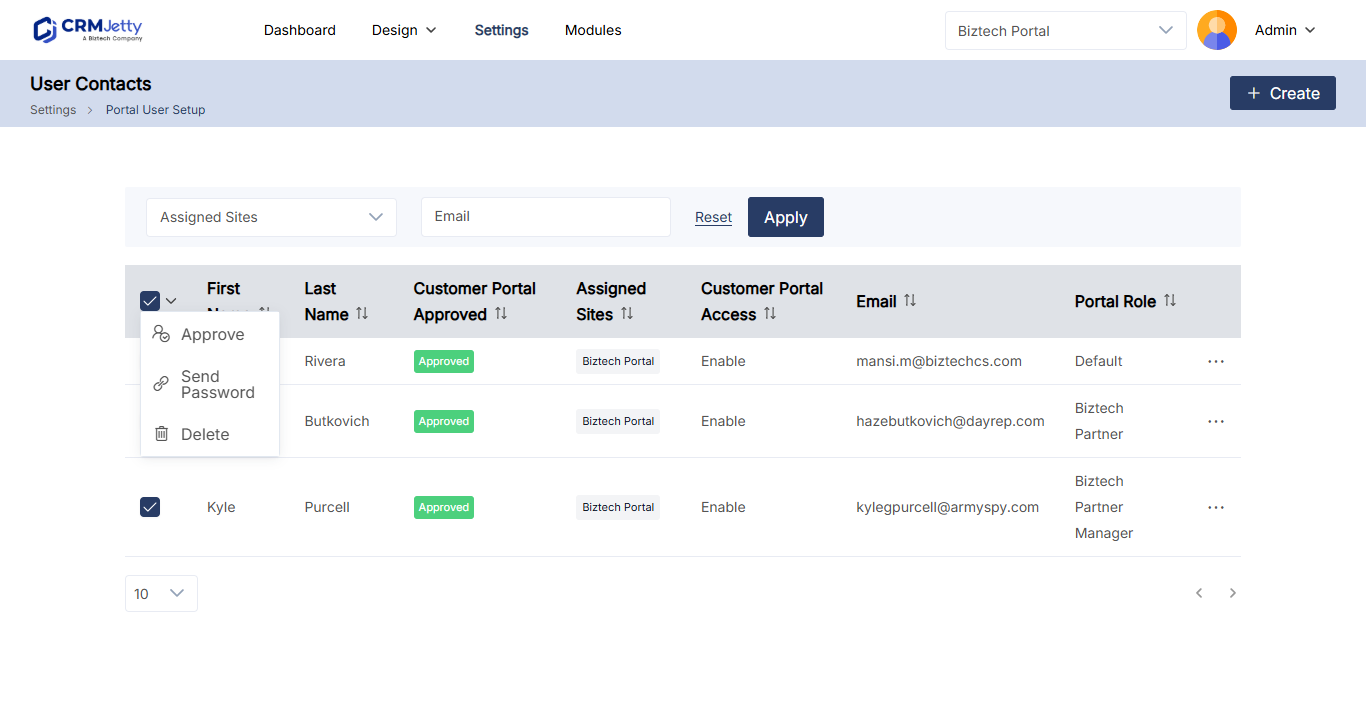
The portal sends each approved user an email with a verification link. Their credentials stay pending until they complete that step.
Tip: Customize the email that approved users receive with the Approve Portal User email action. See How to Customize Portal Email Templates.
Approve a single user and generate credentials
You can also approve one contact while you create or edit it.
- Go to Settings → User Settings → Portal User Setup.
- Select Create, or open an existing contact for editing.
- Set the status to Approved.
- Select Save & Generate Credentials.
The portal approves the contact, generates their credentials and emails them an access link.
Note: If you select Save instead, the contact doesn’t receive a verification link. A contact saved as Not Approved can be approved later from the Portal User Setup list.
Approve vs Enable
The Bulk Actions drop-down in Portal User Setup also has an Enable option. Enable gives selected contacts portal access, asks you to choose a role and shows a summary of selected, disabled and conversion-pending users. Use it for CRM contacts that have never had portal access, or that you disabled earlier. For the full steps, see How to Generate Portal Login Credentials in Bulk.
Troubleshooting
You can’t see the Approve option: Select at least one contact first. If it still doesn’t appear, ask a super admin to check that your admin role has rights to manage portal users.
Approved users don’t receive the email: Check your SMTP settings and send a test email. See How to Fix Portal Emails That Are Not Sending.
Related articles
- How to Enable Email Verification and Admin Approval
- How to Generate Portal Login Credentials in Bulk
- How to Add Portal Users from CRM Contacts
- How to Assign Roles to Portal Users in Bulk
- How to Customize Portal Email Templates