
How to Apply Workflows to Portal Widgets
A workflow does nothing until you select it in a widget. Each widget that shows CRM records has its own workflow setting, so the same records can be filtered on one page and shown in full on another. This article shows where the setting is in each widget.
There are two kinds of workflow:
- Load Data workflows filter which records load. See How to Filter Which Records Portal Users See.
- Update Assigned Rights workflows disable edit, detail or delete on matching records. See How to Restrict Record Access with Conditional Workflows.
Before you start
- You need access to the Design menu in the admin portal.
- Create the workflow in Settings → Portal Settings → Workflow Management, for the same entity as the widget.
- Add the widget to a page. See How to Create Pages in CRMJetty Portal.
Which widgets support which workflow
| Widget | Load Data | Update Assigned Rights | Setting names |
|---|---|---|---|
| List | Yes | Yes | Workflow Setting: Data loading Workflow, Update Assign Rights Workflow |
| Data Card | Yes | Yes | Workflow Setting: Data Loading Workflow, Update Assign Rights Workflow |
| Recent Activity | Yes | Yes | Enable Workflow Settings: Data Loading Workflow, Update Assign Rights workflow |
| Sub-Grid (in a form) | Yes | Yes | Workflow Setting: Data loading Workflow, Update Assign Rights Workflow |
| Counter | Yes | No | Workflow Setting: Data Loading Workflow |
| Chart | Yes | No | Workflow Setting: Data Loading Workflow |
| Knowledge Base | Yes | No | Enable Workflow, then Select Workflow |
| Case Deflection | Yes | No | Enable Workflow, then Select Workflow |
| Custom widget | Yes | No | Enable Workflow: Select Data Loading Workflow |
The Counter and Chart widgets you add inside a form also have Select Data Loading Workflow.
Apply a workflow to a widget
- Go to Design → Page Builder.
- Open the page in edit mode.
- Select the Settings icon on the widget.
- Find the workflow settings. In the Knowledge Base, Case Deflection and custom widgets, turn on Enable Workflow first.
- Select the Load Data workflow in Data Loading Workflow (or Select Workflow).
- Where available, select the rights workflow in Update Assign Rights Workflow.
- Select Save.
- Publish the page.
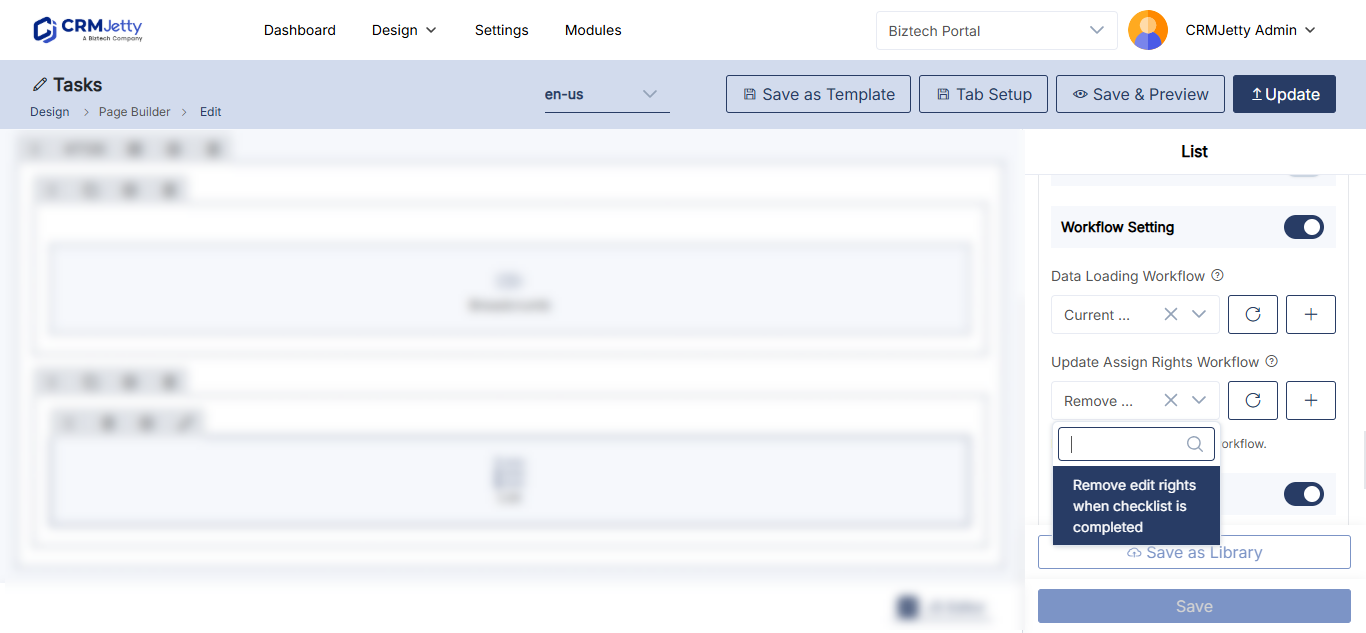
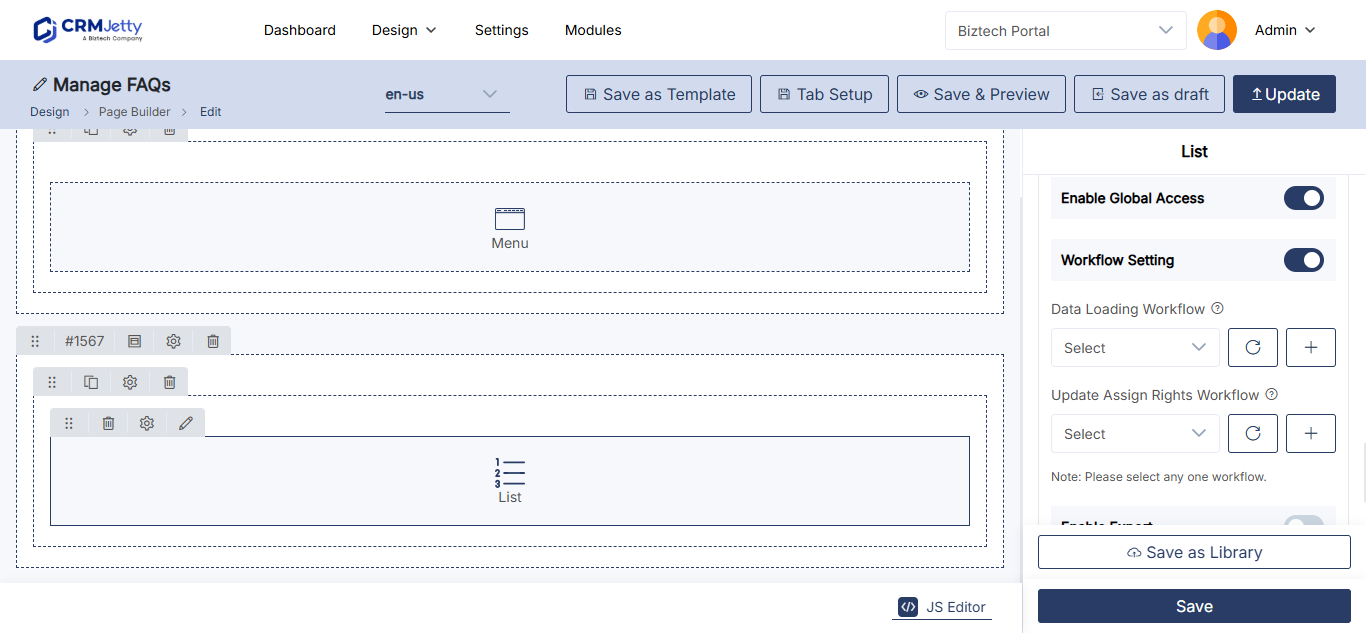
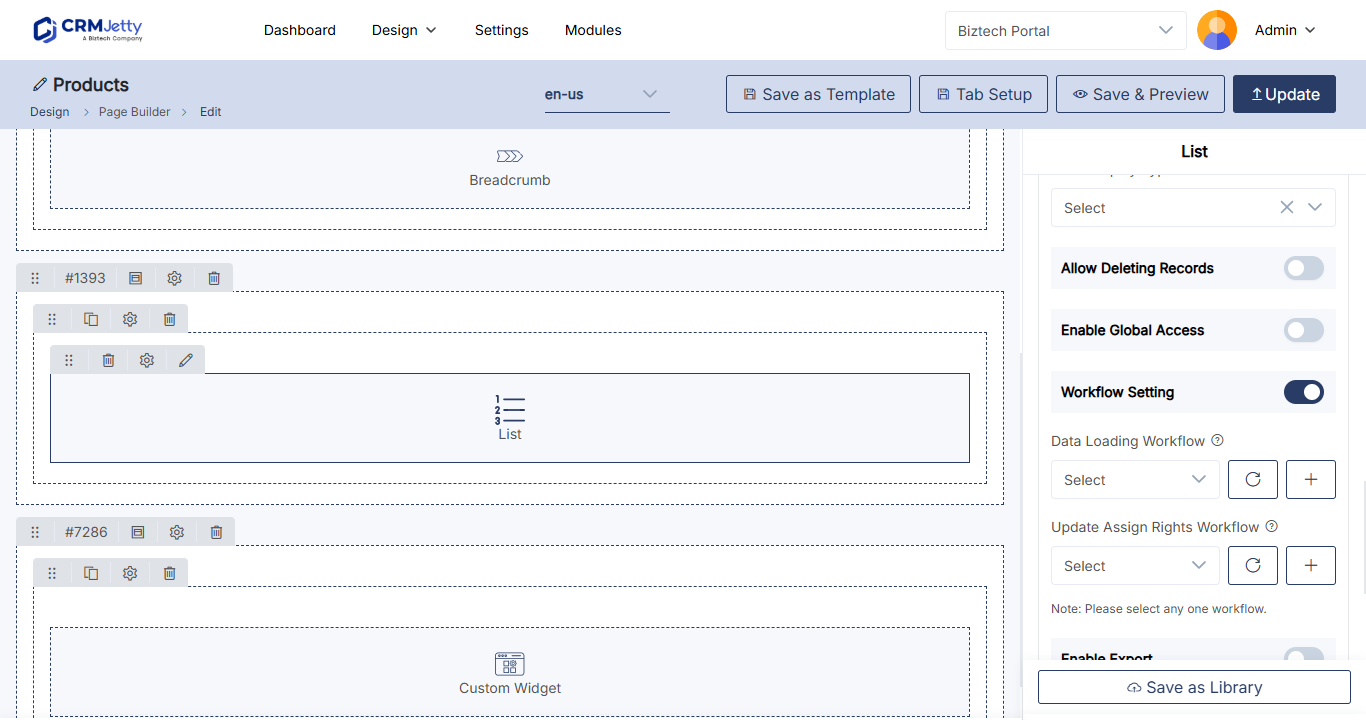
Select one workflow of each type per widget. A workflow applies only to portal users with the roles selected in it.
Tip: Apply the same Load Data workflow to every widget that shows the entity on a page. Otherwise a counter or chart can show totals for records the list hides.
Apply a workflow to a lookup field
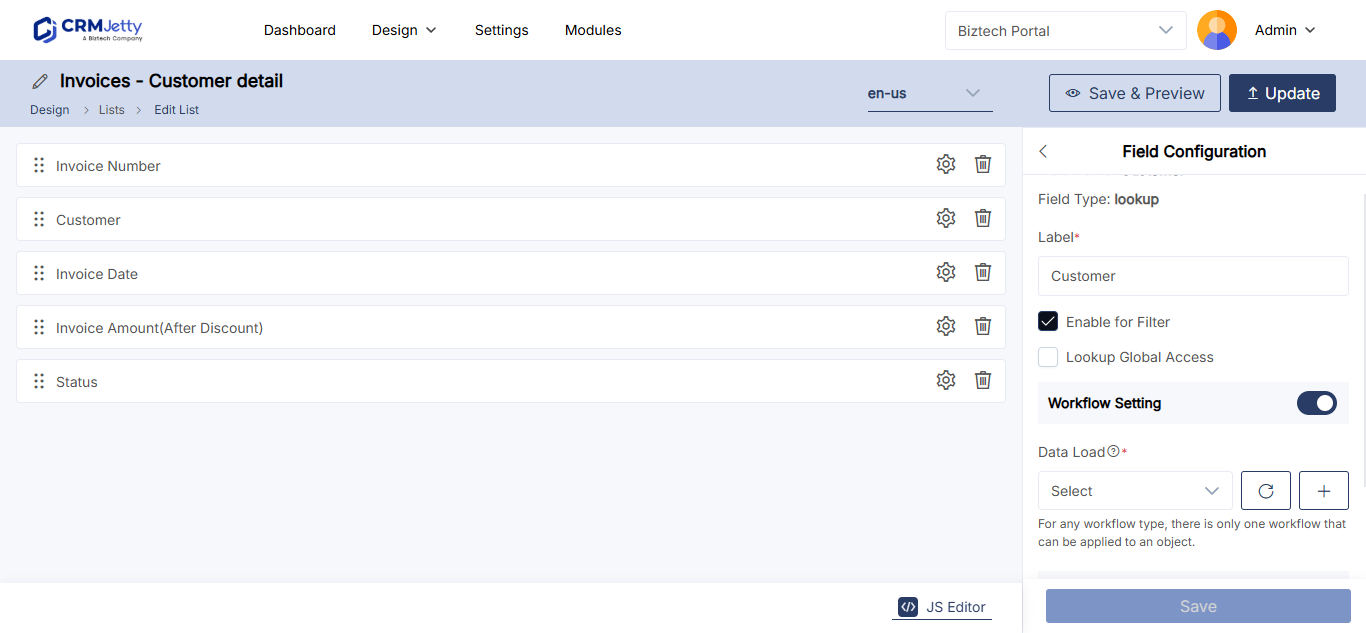
In the list builder and the form builder, a lookup field can use a Load Data workflow to limit the related records it offers.
| Where | When the setting appears |
|---|---|
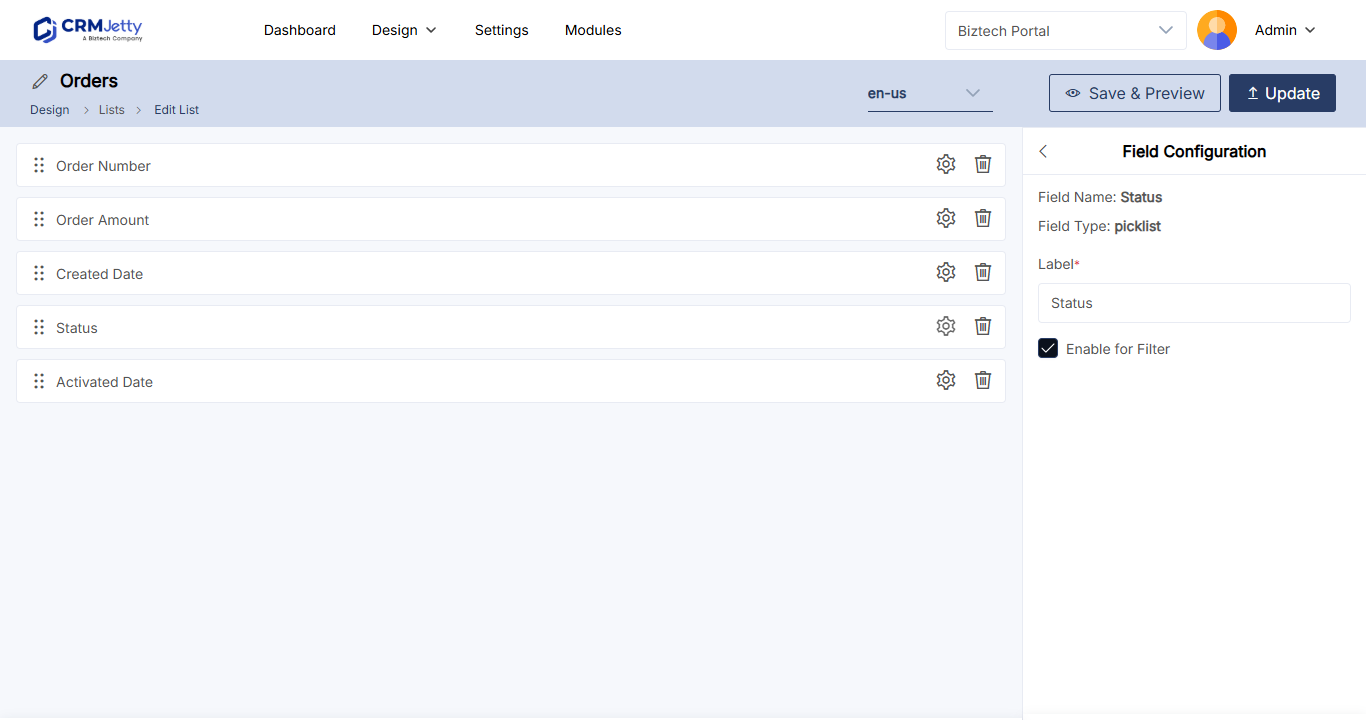
| List builder (Design → Lists) | The field is a lookup and Enable for Filter is selected. |
| Form builder | The field is a lookup, in an Add or Edit form. |
- Select the Settings icon on the lookup field.
- Select Workflow Setting.
- In Data Load, select the workflow. Only workflows with the Load Data action type for the field’s target entity are listed.
- To create a workflow, select +. The Add Workflow page opens with the entity already selected.
- Select Save.
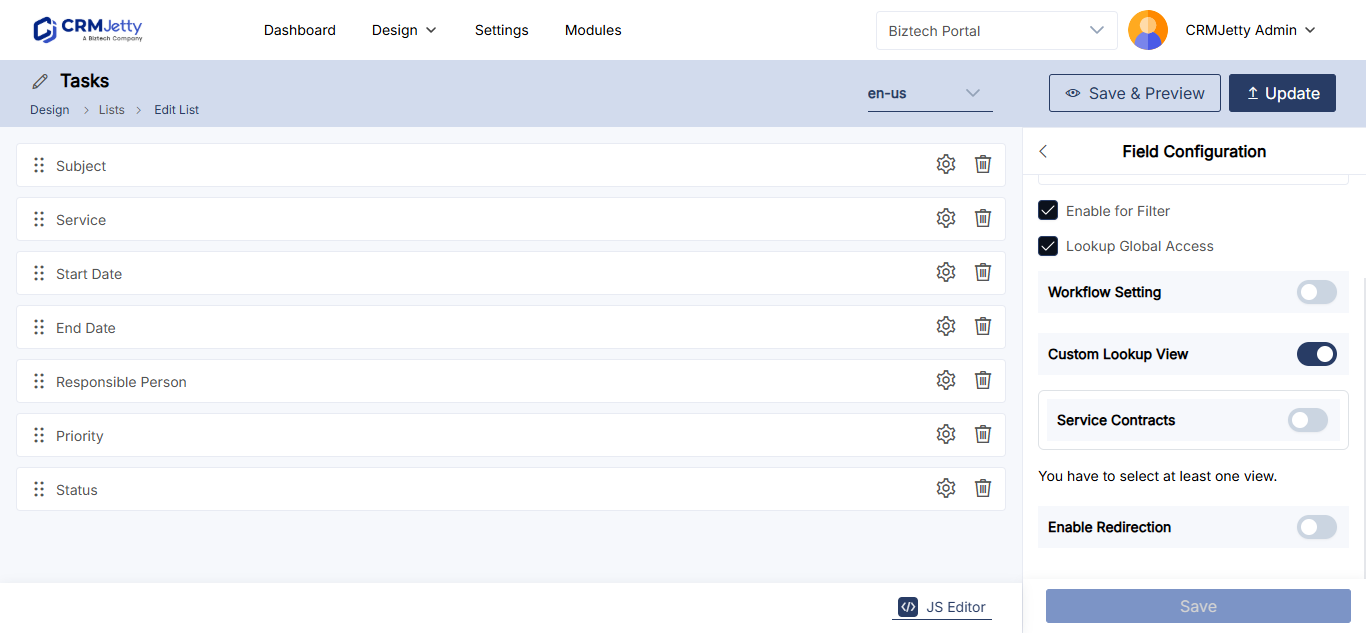
For list filters, see How to Add Filters to Portal List Views.
Troubleshooting
The workflow is missing from the drop-down: The workflow is for a different entity or action type. Counters, charts, knowledge base and case deflection list only Load Data workflows. Check the workflow in Workflow Management.
The widget still shows all records: Check that you saved the widget and published the page, and that the portal user has one of the roles selected in the workflow.
A counter shows a different number than the list: The counter and the list use different workflows, or only one of them has a workflow. Select the same Load Data workflow in both.
Related articles
- How to Filter Which Records Portal Users See
- How to Restrict Record Access with Conditional Workflows
- How to Create List Views in CRMJetty Portal
- How to Build a Customer Portal Dashboard
- How to Add Sub-Grids to Portal Forms