
How to Set Public and Login-Only Portal Pages
Every portal page has a Page Access setting that decides who can open it. Make a page Public to show it to everyone, or Authenticate to keep it for signed-in portal users only.
Before you start
- You need access to Design → Page Builder in the admin portal.
- To restrict what a signed-in portal user can do or see beyond page access, set up roles. See How to Create Portal User Roles and Permissions.
Public vs Authenticate
| Page Access | Who can open the page | Use it for |
|---|---|---|
| Public | Everyone, before and after sign-in. | Login, registration and password pages, a public knowledge base, contact or landing pages. |
| Authenticate | Only portal users who are signed in. | Dashboards, profile pages, and pages that show or edit CRM records. |
Important: Pages where portal users sign in, register or reset their password must be Public. Portal users can’t open an Authenticate page before they sign in.
Set access for a new page
- Go to Design → Page Builder.
- Select Create.
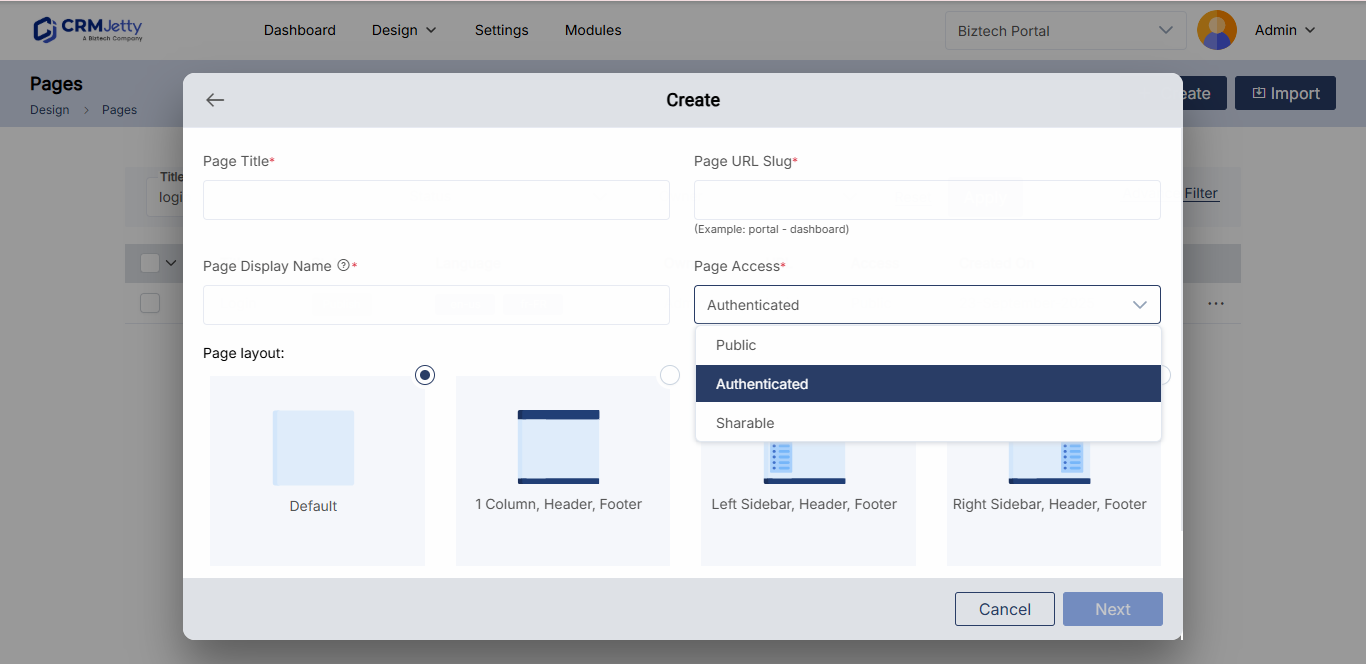
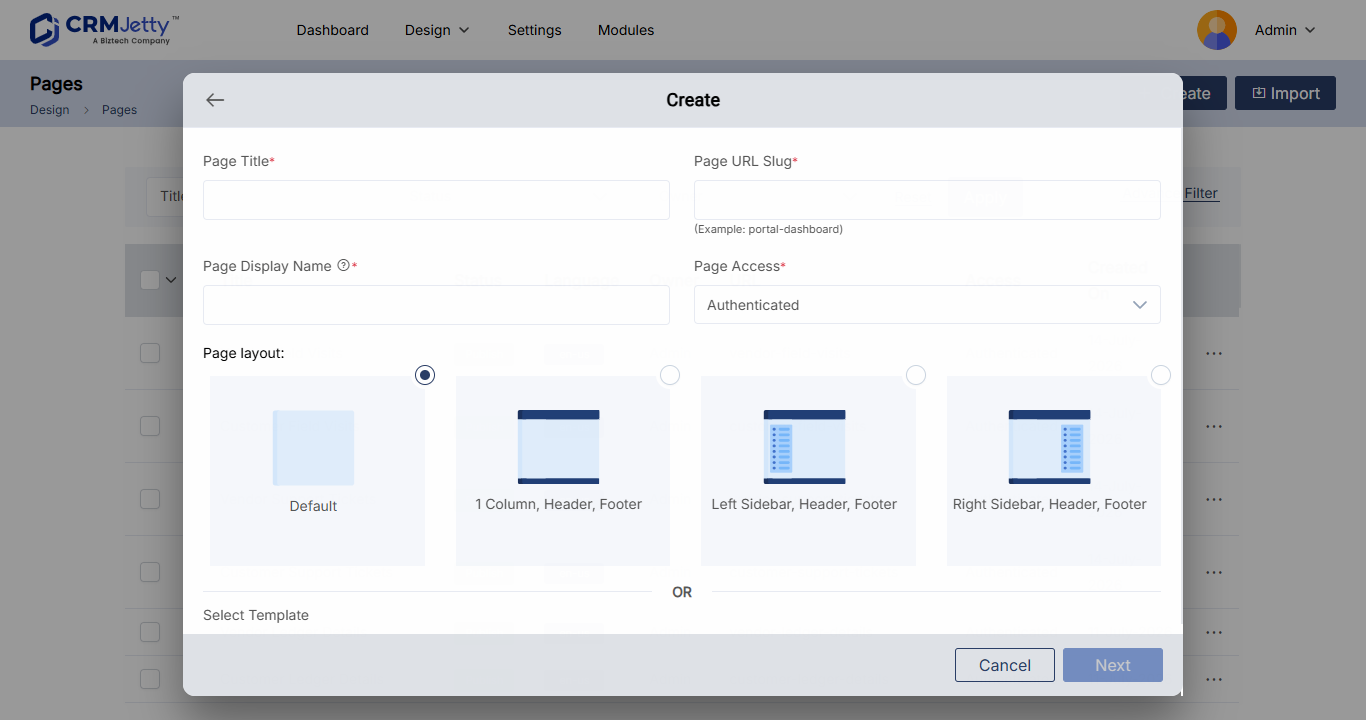
- Enter the Page Title, Page URL Slug and Page Display Name.
- In Page Access, select Public or Authenticate.
- Choose a Page Layout and select Next.
- Build the page, then select Publish.
For the other page settings, see How to Create Pages in CRMJetty Portal.
Change access for an existing page
- In Page Builder, select the three dots (…) next to the page.
- Select Edit.
- Change Page Access.
- Select Update.
Check the access of your pages
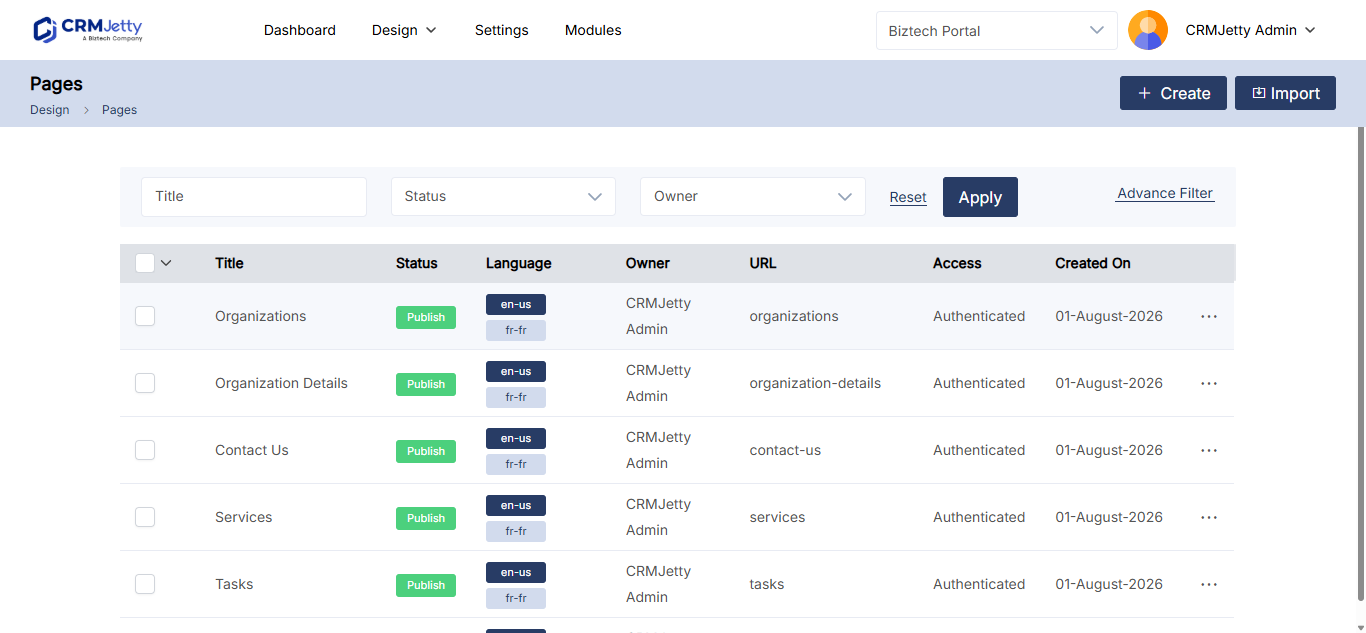
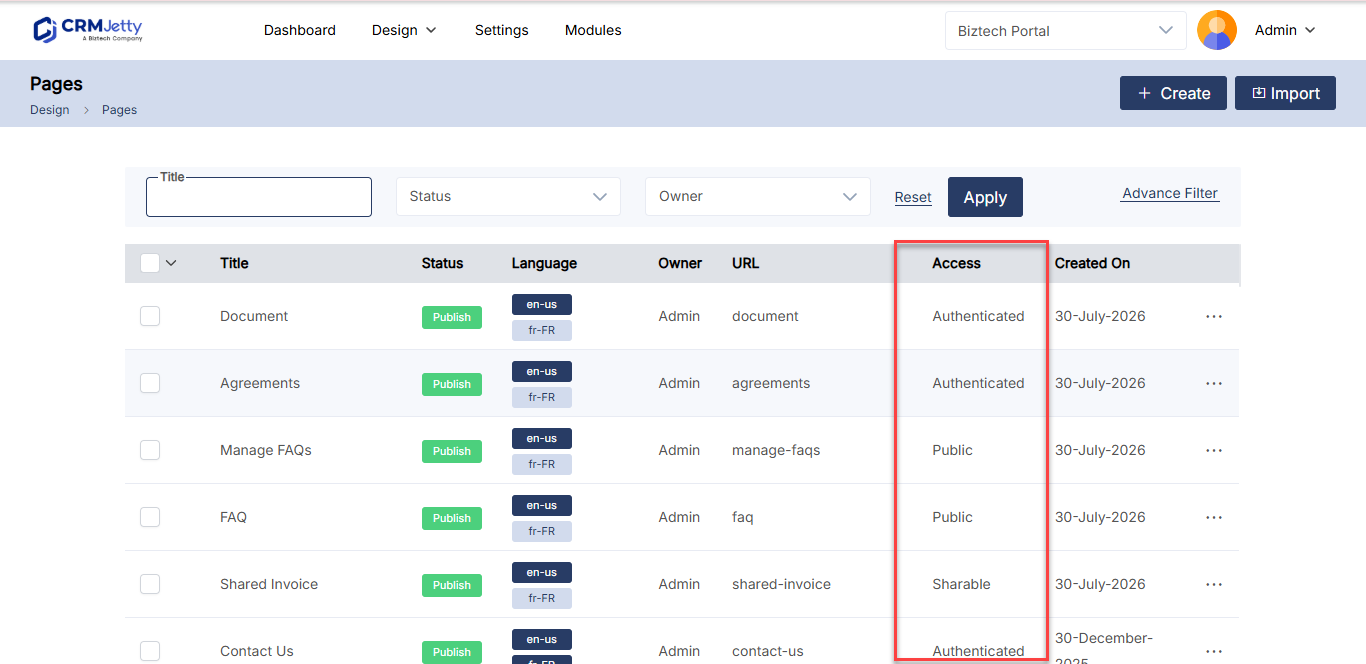
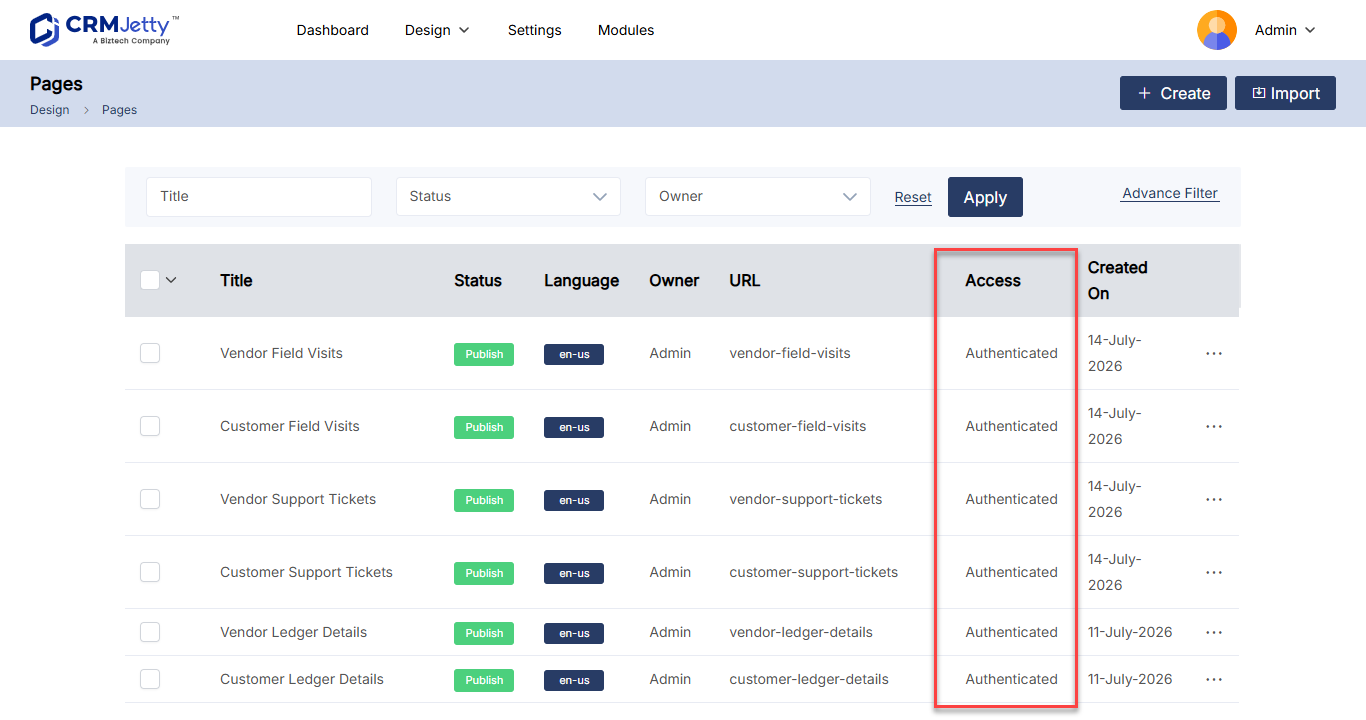
The Access column in the Page Builder list shows Public or Authenticated for each page. Check it before you go live, so private pages aren’t left public.
Page access and menus
Page access controls who can open a page. To control who sees a link to the page in the navigation, limit the menu item to roles with Select Role in Menu Builder. See How to Create Portal Navigation Menus.
Tip: To protect a public page from spam, enable reCAPTCHA V3 for the page in the site’s reCAPTCHA settings. See How to Add reCAPTCHA to Portal Forms.
Related articles
- How to Create Pages in CRMJetty Portal
- How to Publish, Draft and Duplicate Portal Pages
- How to Create Portal Navigation Menus