
How to Enable CRM Entities and Custom Objects in the Portal
Before you can use an entity (Dynamics 365), object (Salesforce) or table (Business Central) in portal pages, forms and lists, you enable it in Entity Configurations. You don’t add CRM entities to the portal by hand: once your CRM is connected, the portal lists them for you. Both standard and custom entities can be enabled.
Before you start
- Connect your CRM first. You cannot enable entities until CRM authentication succeeds. See CRM Connection Requirements for CRMJetty Portal.
- If you just added the entity or custom object in your CRM, sync the CRM with the portal first so the entity appears in the list. See How to Sync CRM Layout Changes to Your Portal.
For Business Central, tables are enabled on a separate page, Settings → User Settings → Table Configurations (BC Tables and Portal Tables). See How to Configure Business Central Table Sync.
Which entities you can enable
- The CRM Entities list shows the entities related to contact and account in your CRM.
- Both standard and custom entities can be enabled.
- Entities can use both default and custom CRM relationships.
Enable an entity
- Sign in to the admin portal.
- Go to Settings → User Settings → Entity Configurations.
- In CRM Entities, find the entity. Search by name or scroll the list.
- Drag the entity into the Portal Entities section.
- Repeat for each entity you want to enable.
- Select Save.
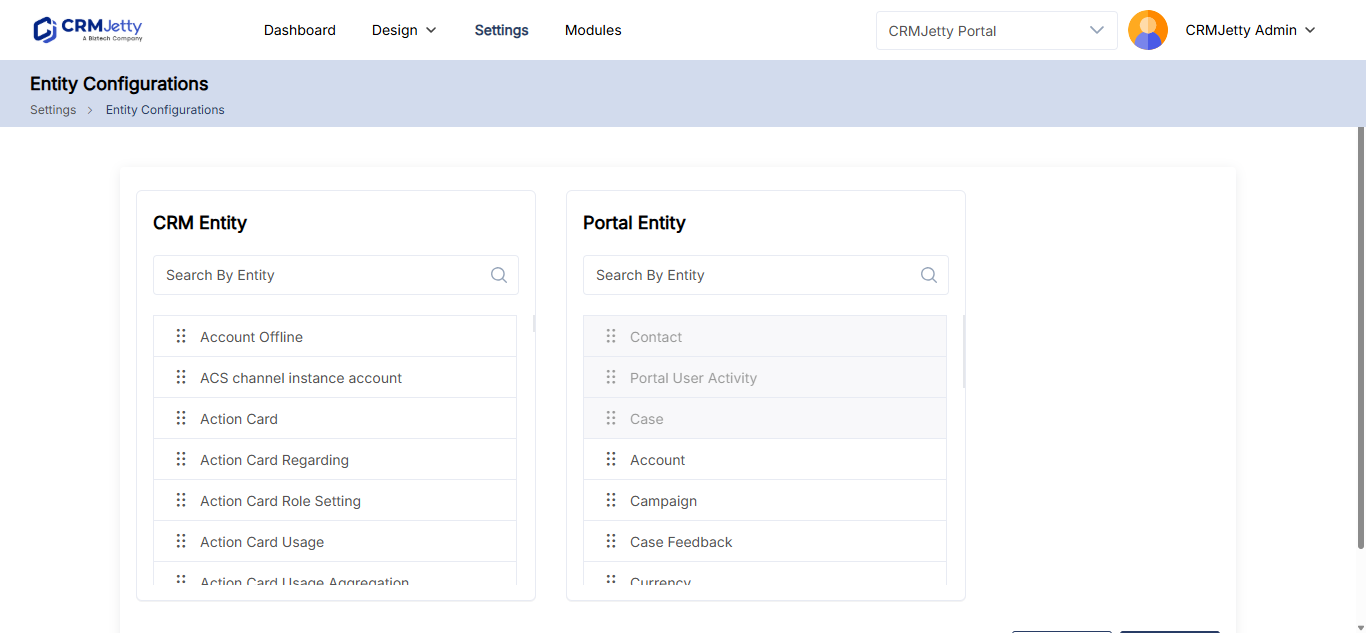
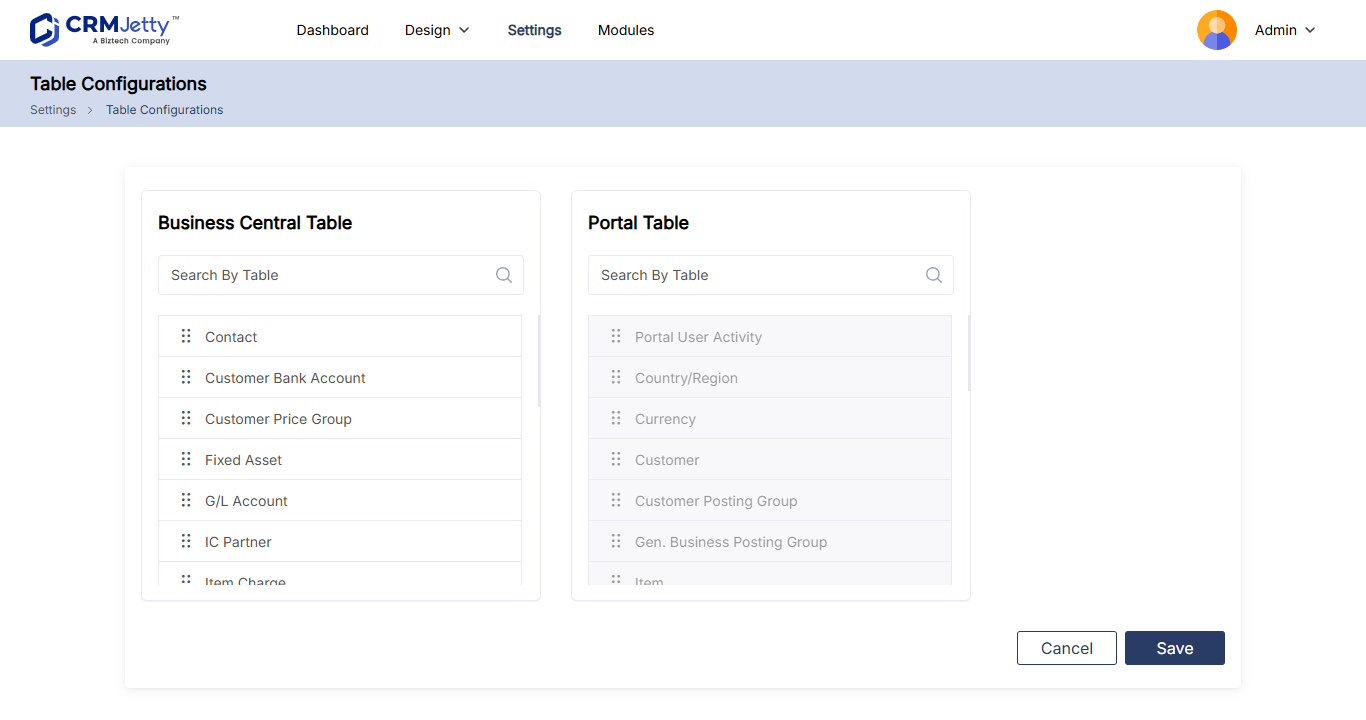
Tip: You can also open this page from the admin dashboard: select Enable New Entity in the Quick Access panel.
After you enable an entity
An enabled entity is not visible to portal users until you build on it:
- Give portal user roles access to the entity. See How to Create Portal User Roles and Permissions.
- Create the forms and lists that show its records. See How to Create a Portal Form for Any CRM Entity and How to Create List Views in CRMJetty Portal.
- Add those forms and lists to a page.
Form and list builders only show entities that are enabled for the portal.
Remove an entity from the portal
- Go to Settings → User Settings → Entity Configurations.
- Drag the entity from Portal Entities back into the CRM Entities list.
- Select Save.
Important: When you remove an entity, portal users can no longer access its data through the portal, and you can’t use it in lists, forms or pages. Primary entities that the portal needs, such as cases and content, can’t be removed.
Troubleshooting
An entity or custom object is not in the CRM Entities list: Sync the CRM with the portal from Settings → Portal Settings → Portal Sync, then reopen Entity Configurations. Also check that the entity is related to contact or account in your CRM.
An entity does not appear in the form or list builder: It is not enabled for the portal yet. Drag it into Portal Entities and select Save.
Related articles
- How to Sync CRM Layout Changes to Your Portal
- How to Create Portal User Roles and Permissions
- How to Create a Portal Form for Any CRM Entity
- How to Create List Views in CRMJetty Portal
- How CRM Data Sync Works in CRMJetty Portal